I know. I know.
It seems like, every time we turn around, folks are telling us we have to be on this social platform or using that social strategy. And it seems like every few months, each platform launches another new way to use it. How can an author keep track of ALL THE THINGS?
But trust me.
This Instagram Stories is a platform all authors should absolutely be using to build their brand, increase their reading audience, and yes, sell more books.
Why?
As of the most recent stats (early 2020), over 500 million Instagram users were posting 1 billion IG Stories every single day. Better than that? 62% of people surveyed said they become more interested in a product or brand after seeing their IG Story!

Authors…we absolutely MUST get in on that action!
How to Make an Instagram Story Using BookBrush
First and likely most important of all of my tips is to use great lighting!
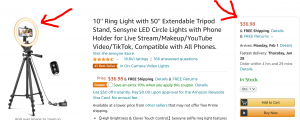
Nothing can turn a viewer away faster than poorly lit videos and photos. But don’t try to rely on your phone’s “brightness” settings, even if you are rocking the most recent version! Instead, invest in a Ring Light. You can find these in varying sizes on Amazon from smaller desktop versions to tall lights that can adjust in height up to 6 feet! I bought this one on Amazon for less than $40, and it has made all the difference in my photos and videos.
Okay, with lighting taken care of, you do need to put your best face forward.
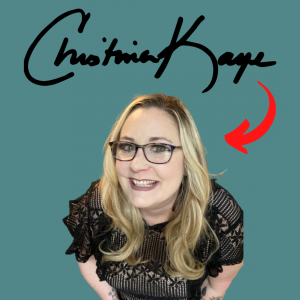
Listen, folks. As a “curvy” girl, up until last year, I would never even consider being in pictures, let alone taking “selfies!” I was far too insecure for that. Eventually, when I started Write Your Best Book, I heard some amazing advice about being the face of your brand (and this goes for your books, too), and I decided to bite the bullet, get myself as pretty as I could possibly feel, and take the darn shots. And you know what? Now, I take them almost every day. It’s not about what size you are, your hair, or your complexion. It’s about CONFIDENCE (real or pretend) and that confidence will shine through in your videos and photos. TRUST ME!
All right. Lighting? Check. Hair and Makeup? Check. Now what?
As authors, we have two things to feature on any social media channel: our books and ourselves. You want to create content that features you, your writing process, and your books, switching it up every day so every single post doesn’t come off as “buy my book!” pushy. Post clips of you writing, your screen (with words blurred), you reading your favorite book, more of you writing, holding up your latest book, reading your first few sentences of your book…you get the picture (pun intended).
The key (and so many people miss this, so listen up!) is to keep your Ideal Reader Avatar (IRA) in mind. What’s that? Your IRA is (hopefully) the short story you’ve written up that clearly defines who your target reader is, including their demographics, interests, and hobbies. Yes, I know. You want EVERYONE to love your books. But guess what? They’re not gonna. Instead, and this goes for writing, too, ask yourself which group of readers is most likely going to be drawn to your story if they saw it on Amazon or in a bookstore? Now that you have that in mind, create every post, every caption, and choose every hashtag with that target reader in mind.
Let me be clear. Your audience is NOT other authors. Though, yes, many authors happen to also be avid readers. But when searching for your target audience on any social forum, you need to be looking for keywords and hashtags such as:
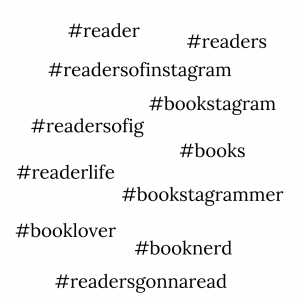 Because those people who love reading books so much, they center their entire social profiles and feeds around loving books, and that, my friends, is YOUR TRIBE.
So, again, what you post doesn’t matter as much as the intention behind your posts and who your posts are targeted at.
Brand Your Content
Another important thing to remember when creating your content is to keep it all “on brand.” Hopefully, by now, you have picked 2-3 colors and a couple fonts, maybe even a slogan, which all fit the genre you write in. This is your “brand.”
If you have not done this yet, do it now. Having a clear, discernable brand your readers recognize as unique to you and your books will set you apart from the herd.
Once you’ve established your unique brand, save the hex codes for your chosen colors, as well as your two fonts, so you can easily find them anytime you need. Then, hop over and use Book Brush to create images that are “on brand” to post on your IG Stories. Here’s how.
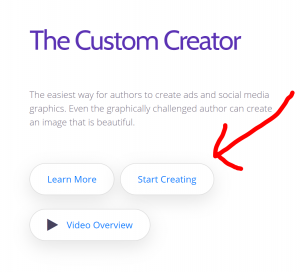
From the Book Brush home page, after signing in, click on Custom Creator, then Start Creating
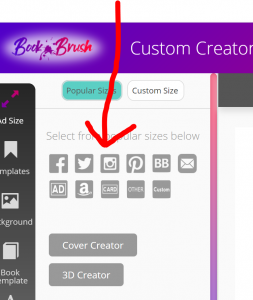
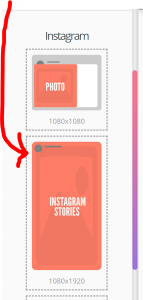
Now, you’re inside the custom creator, where you will create your beautiful, branded IG Story content. The next thing you need to do is click on Templates and select Instagram under Favorites, then scroll just a bit, find IG Story, and click that. Instantly, a perfectly sized IG Story template will show up in the workspace. This will make sure your content is created in the perfect size to fit your Story.
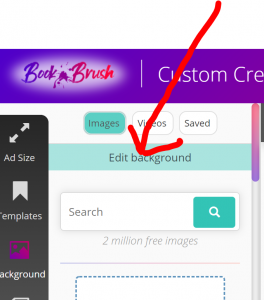
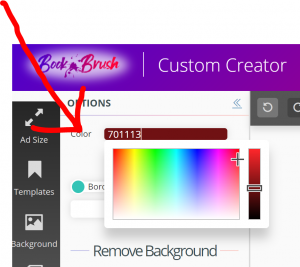
Next, click on Background on the left-hand menu. This will allow you to either upload any images you have procured (be sure they are stock free!) or you can search for the right background from Book Brush’s exhaustive database (2 million) of beautiful images. In this example, I’m searching for backgrounds that match my branding color (hex code 701113) by clicking Edit Background then typing my hex code in the search bar:
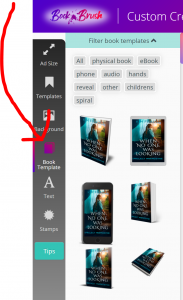
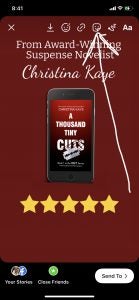
Next, I hit Book Template, which brings me to another search where I can choose the mockup style I want to add to the Story (I’ll add my book cover next). For this one, I chose a cell phone image.
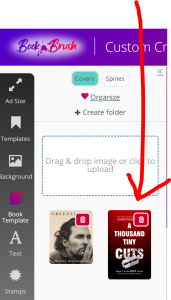
Then, I upload my book cover (front only) and select it, and BAM! Book Brush creates a cell phone mockup of my book cover!
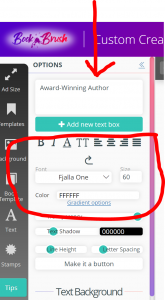
You can spend some time exploring ALL the amazing features Book Brush offers to customize and personalize your branded IG Story content. Here, I mostly focused on a basic Story (though you can get as fancy as you want) by simply adjusting the font to one that fits my brand, the size, color, alignment, etc.
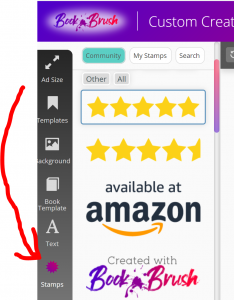
Next, you can even add stamps to your story content! Let’s say your book’s received a 5 star review, or you want to say “Available on Amazon,” or “USA Today Bestselling Author!” You can add these stamps (and more) to your content by clicking on Stamps in the left-hand menu, then finding the one you want, clicking on it, and it then automatically appears on your workspace. Simply resize as needed.
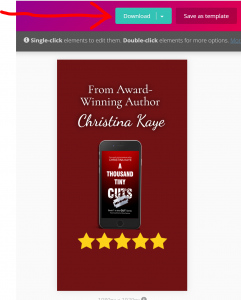
Once you have the basic content completed, you’ll want to save the image as a PNG (recommended) by clicking on Download up on the top menu and saving it to your computer.
To get it to your phone, you can either email it to yourself or you can drop it in Google Drive (or whatever cloud-based storage you use) if you have access to that on your phone. Then, follow these final steps to post the stories.
How to Upload Your IG Story
Find the Instagram app on your phone.
- Open IG on your phone.
- Click on the plus inside a box symbol [+] in the top right corner
- Press and hold the white circle to record video
Now, you can record yourself talking (more on about what later) in 15 sec increments
- Select up to four videos of you speaking (15 sec each)
OR
Follow Steps 1 and 2 above, then
- Upload pre-created content by clicking the little picture icon in the bottom left corner
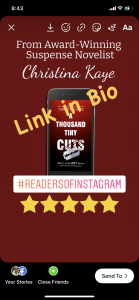
- Once your content comes up on the screen, you can use the options at the top to zhush it up a bit and elements like:
- Stickers to emphasize your point, like hashtags, location, or other fun stickers
- Text that says whatever you want. I always say “Link in Bio!”
Once you are satisfied with your content, click SEND TO
It will bring you to this screen, where you want to click MY STORY
And BAM! You’ve posted your first story!
There are plenty of experts out there who are much more qualified than me to talk about all the bells and whistles you can add to up your IG Story game, but this will get you started.
Final Thoughts
Coincidentally, as I was writing this post, I got word that a corporate memo was “leaked” today that reportedly reveals what IG says we must do every single day to be noticed on the feed. You ready for this? It’s a lot!
3 posts per week
8-10 stories per week
4-7 reels per week
1-3 IGTVs per week
Now, with this knowledge and this post go get you started on Stories, you should consider planning (“batching”) your content once a week then either posting daily or you can use Planoly, Buffer, or other social media posting platforms to schedule your posts. I typically create content every weekend and put it in Planoly, scheduled throughout the week.
I hope this post helps at least some of you get started with IG Stories and learn how to use Book Brush to create beautiful, branded content.
Talk soon,
Christina Kaye
Article by Christina Kaye
Christina Kaye is an author coach, book editor, public speaker, and writing instructor, as well as host of a top-ten rated podcast for authors. Through her business, Write Your Best Book, Christina teaches, supports, and encourages authors to write their best book and become their own book boss through a wide range of book editing and author coaching services, as well as online courses and downloadable resources. Christina Kaye is also an award-winning, bestselling suspense novelist in her own right.
