In the past few posts, we’ve talked about creating back covers that lead to sales, a deeper dive on writing blurbs, using segments of those blurbs in advertising memes and now for some do’s and don’t for creating the spine of your paper or hard back book.
- Note: see this post on creating paperback covers which explains a lot about what the various lines on your template means, why you need to pay attention to them.
Right off the bat, the biggest issue I see with spines is the fold line. Yes, the paperback printers are careful about this, but sometimes I do see the spine or the cover bleed onto the other, and that isn’t what we want.
Before you begin, if you want to use the same fonts on your spine as the cover, in Book Brush, you easily import them!
- Note: I had created my ebook cover prior to creating the full cover, so brought it in as an image and use it all the time in creating memes.
Using A Full Spread Image As The Spine’s Background
Let’s get started.
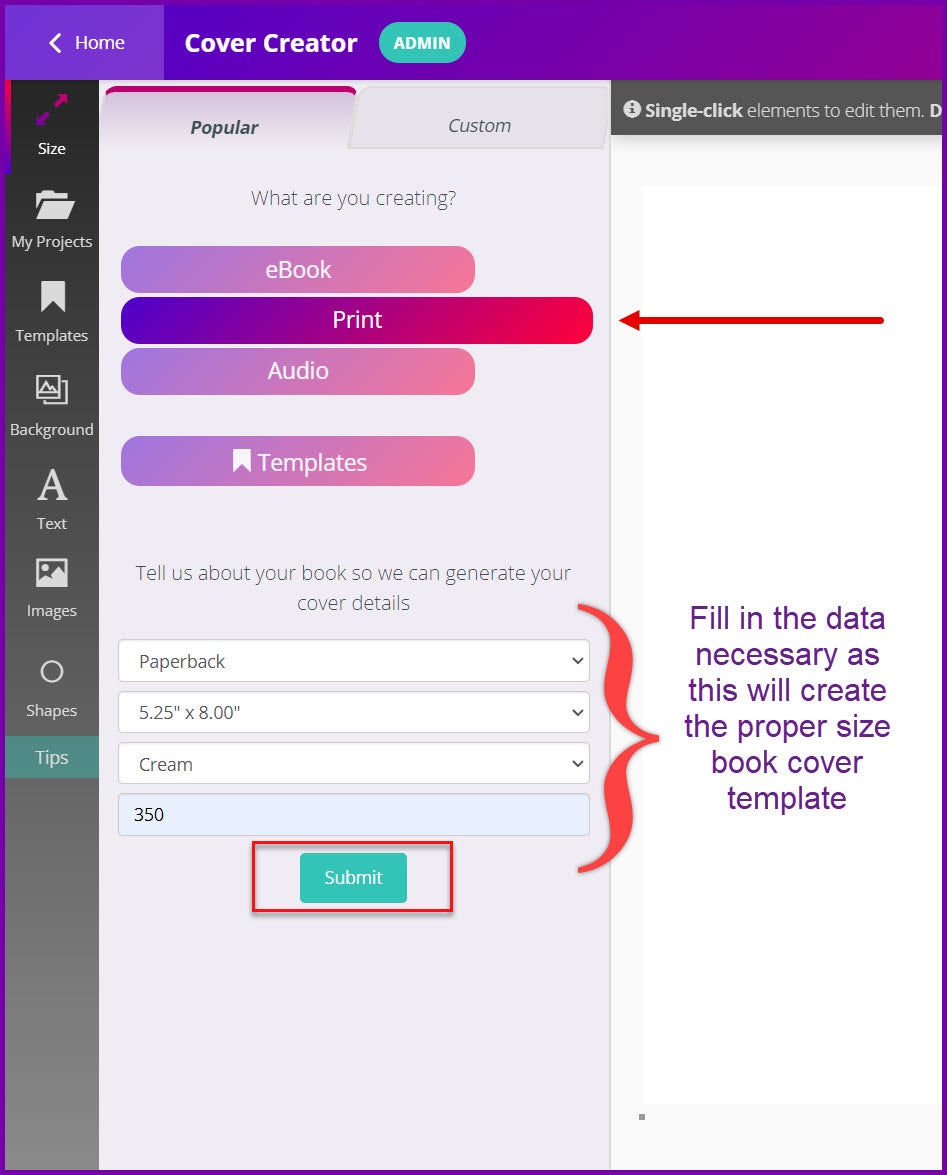
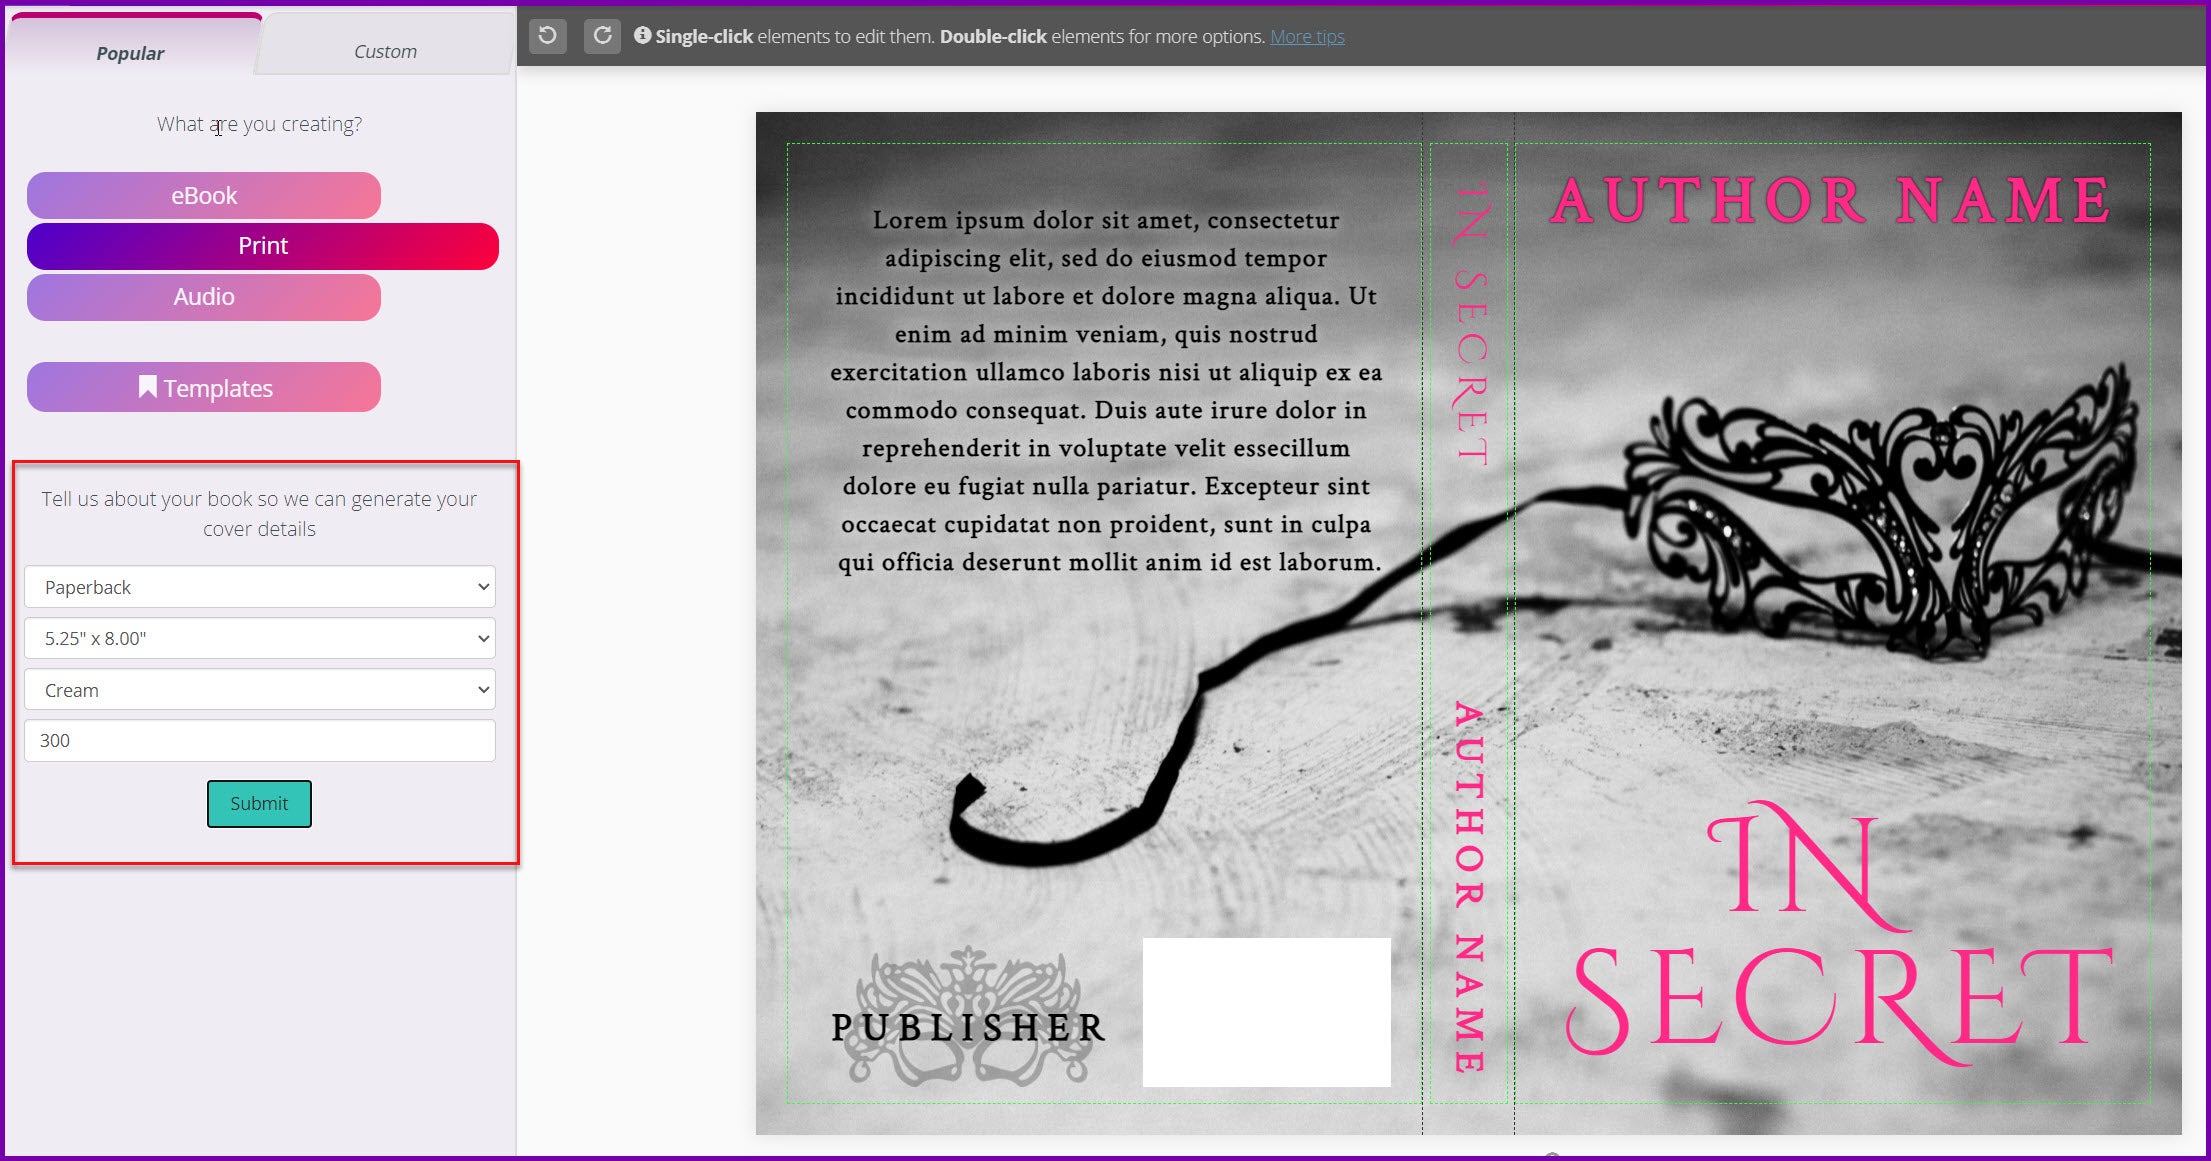
Open the Cover Creator tool and fill in the data so you can get the right template size for your book. Easy Peasy!
Click on image to enlarge
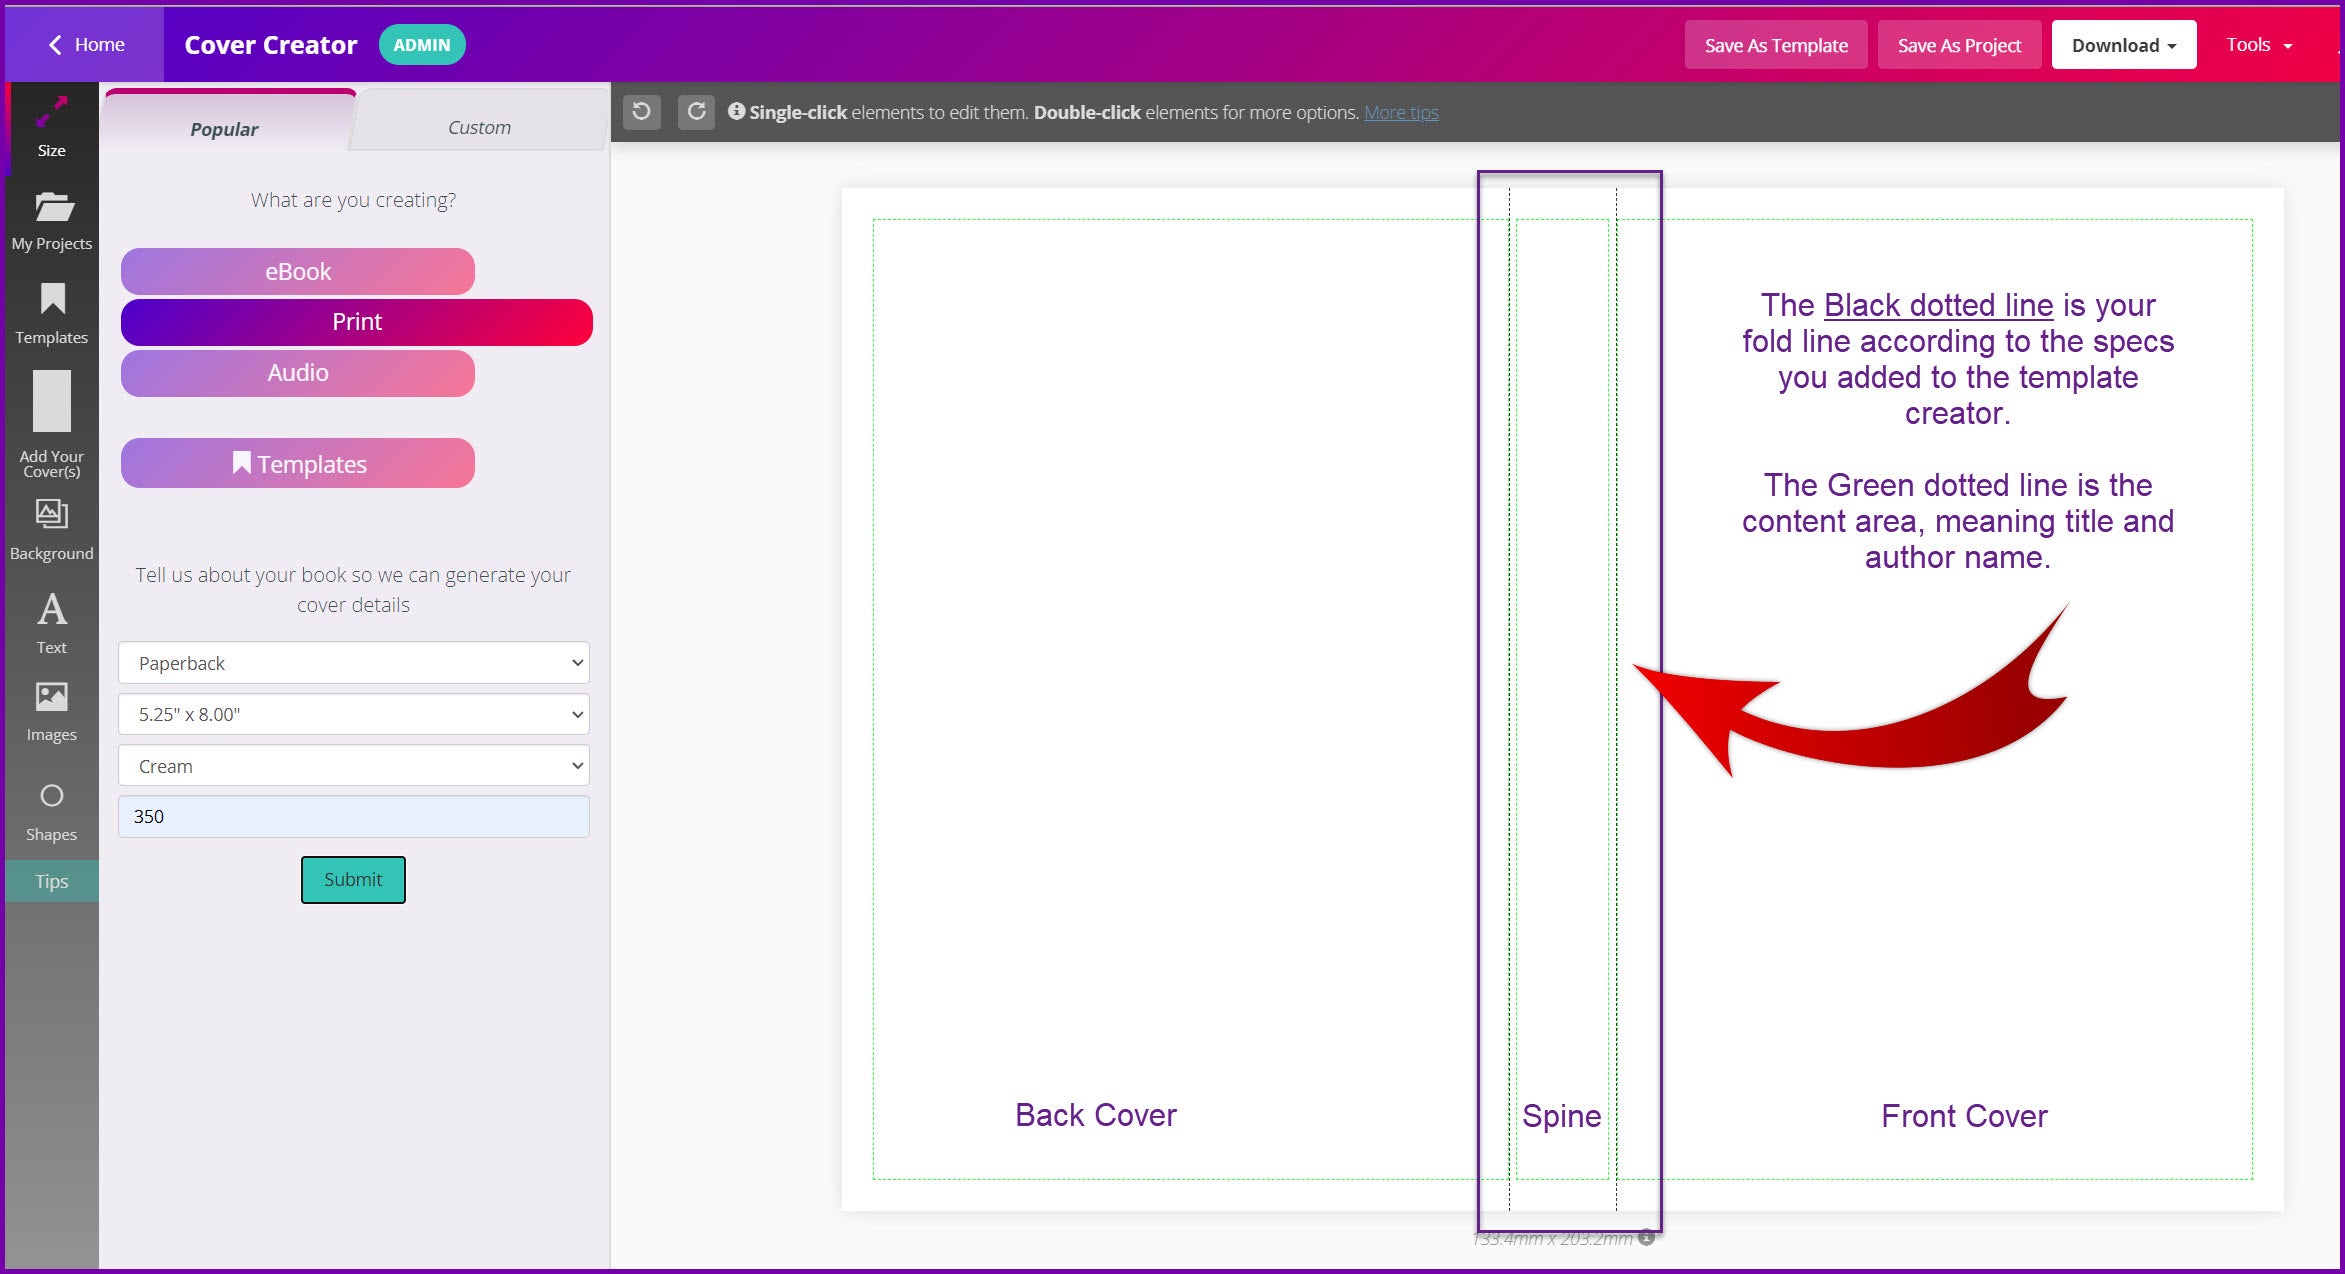
Once Submit has been clicked, you’ll see your template appear in the workspace. The spine size has been generated by data you added and will be the correct width for the number of pages you indicated.
Click on image to enlarge
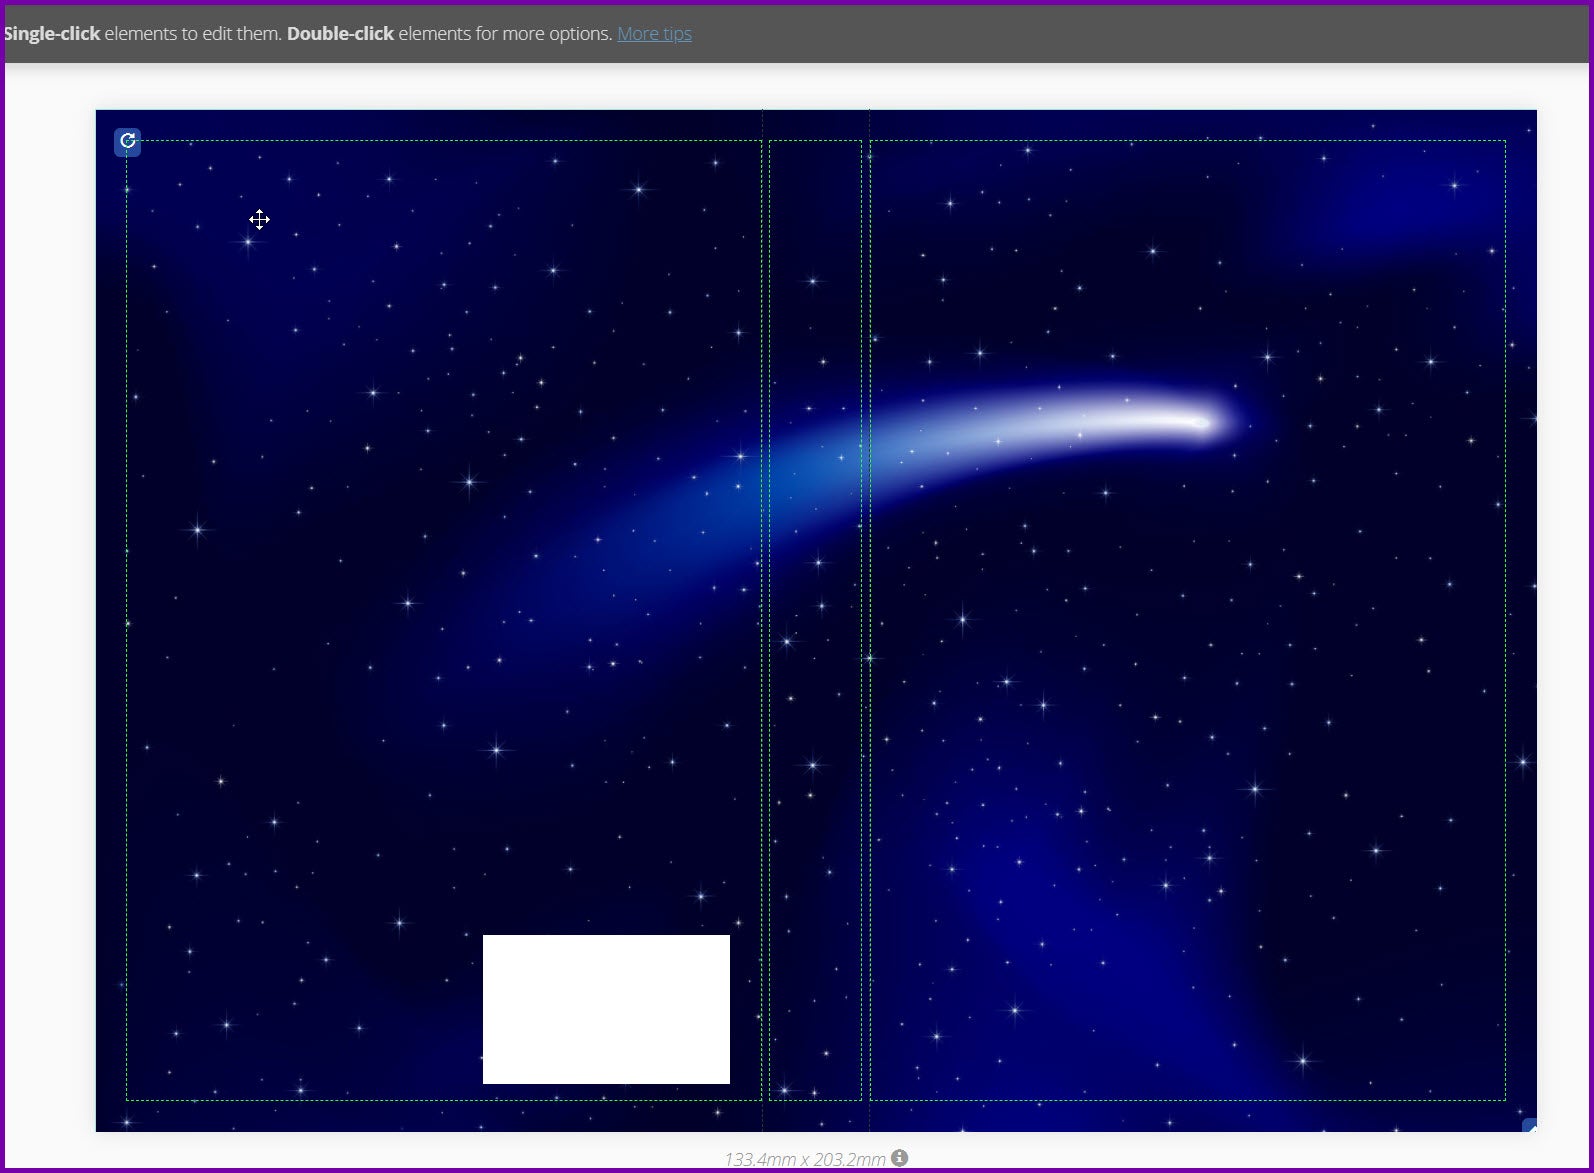
Now you can start adding elements to your cover/spine. Since this is a full image background I’m bringing in, it will fill the entire cover.
- Note: It’s important that your image cover the VERY edges of the template. Again review this post.
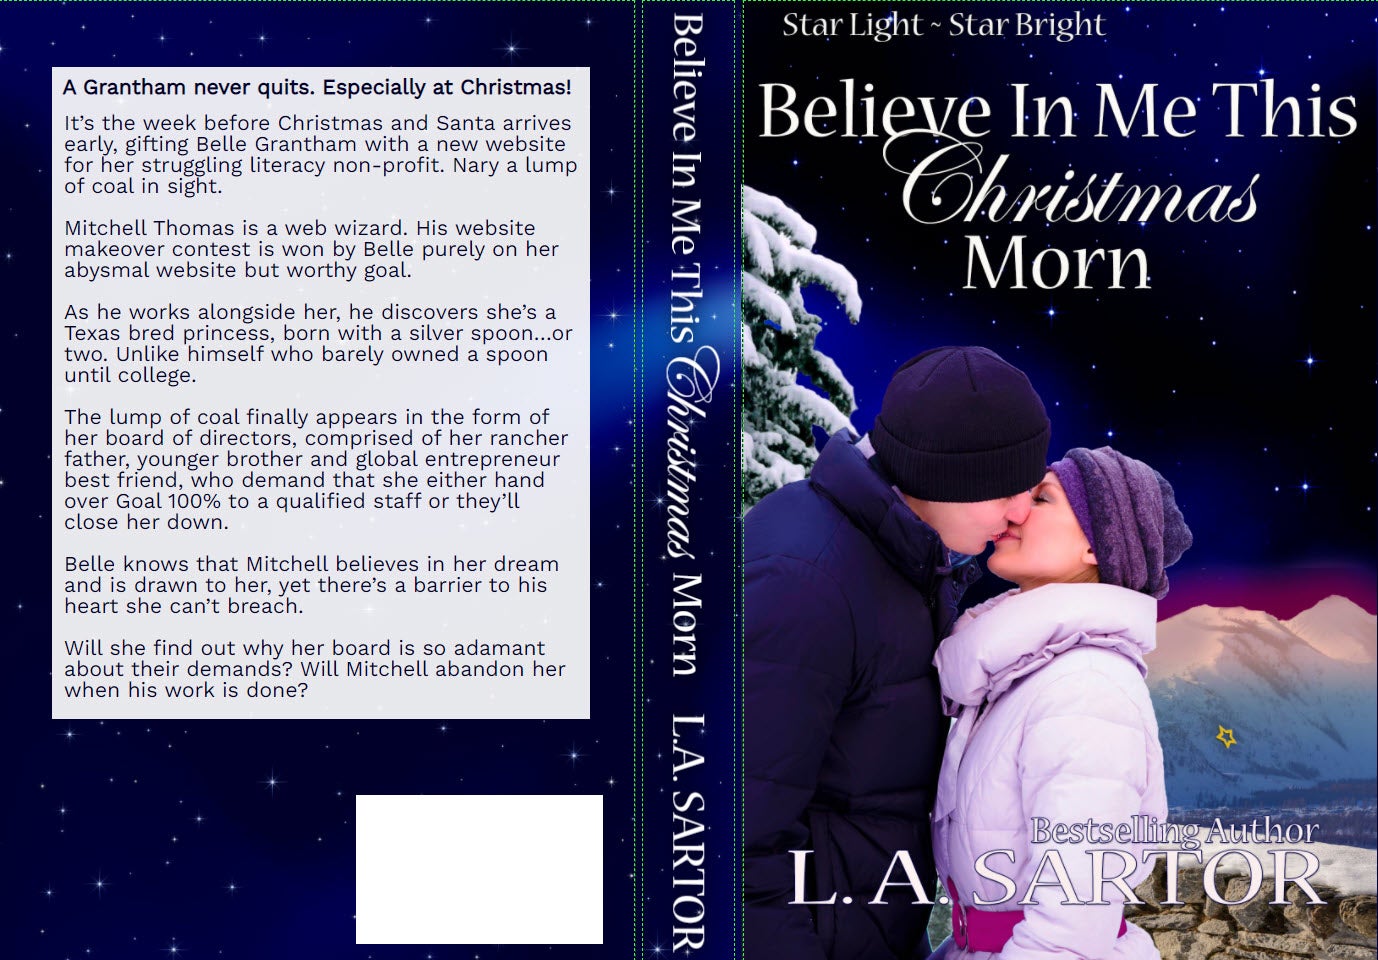
I use this particular image in my entire Star Light ~ Star Bright series one way or another. (BTW, the white box is a placeholder for your ISBN number.)
Click on image to enlarge
I then brought in my cover and sized it to fit, and I typed out 4 text boxes. So far, fast and easy…
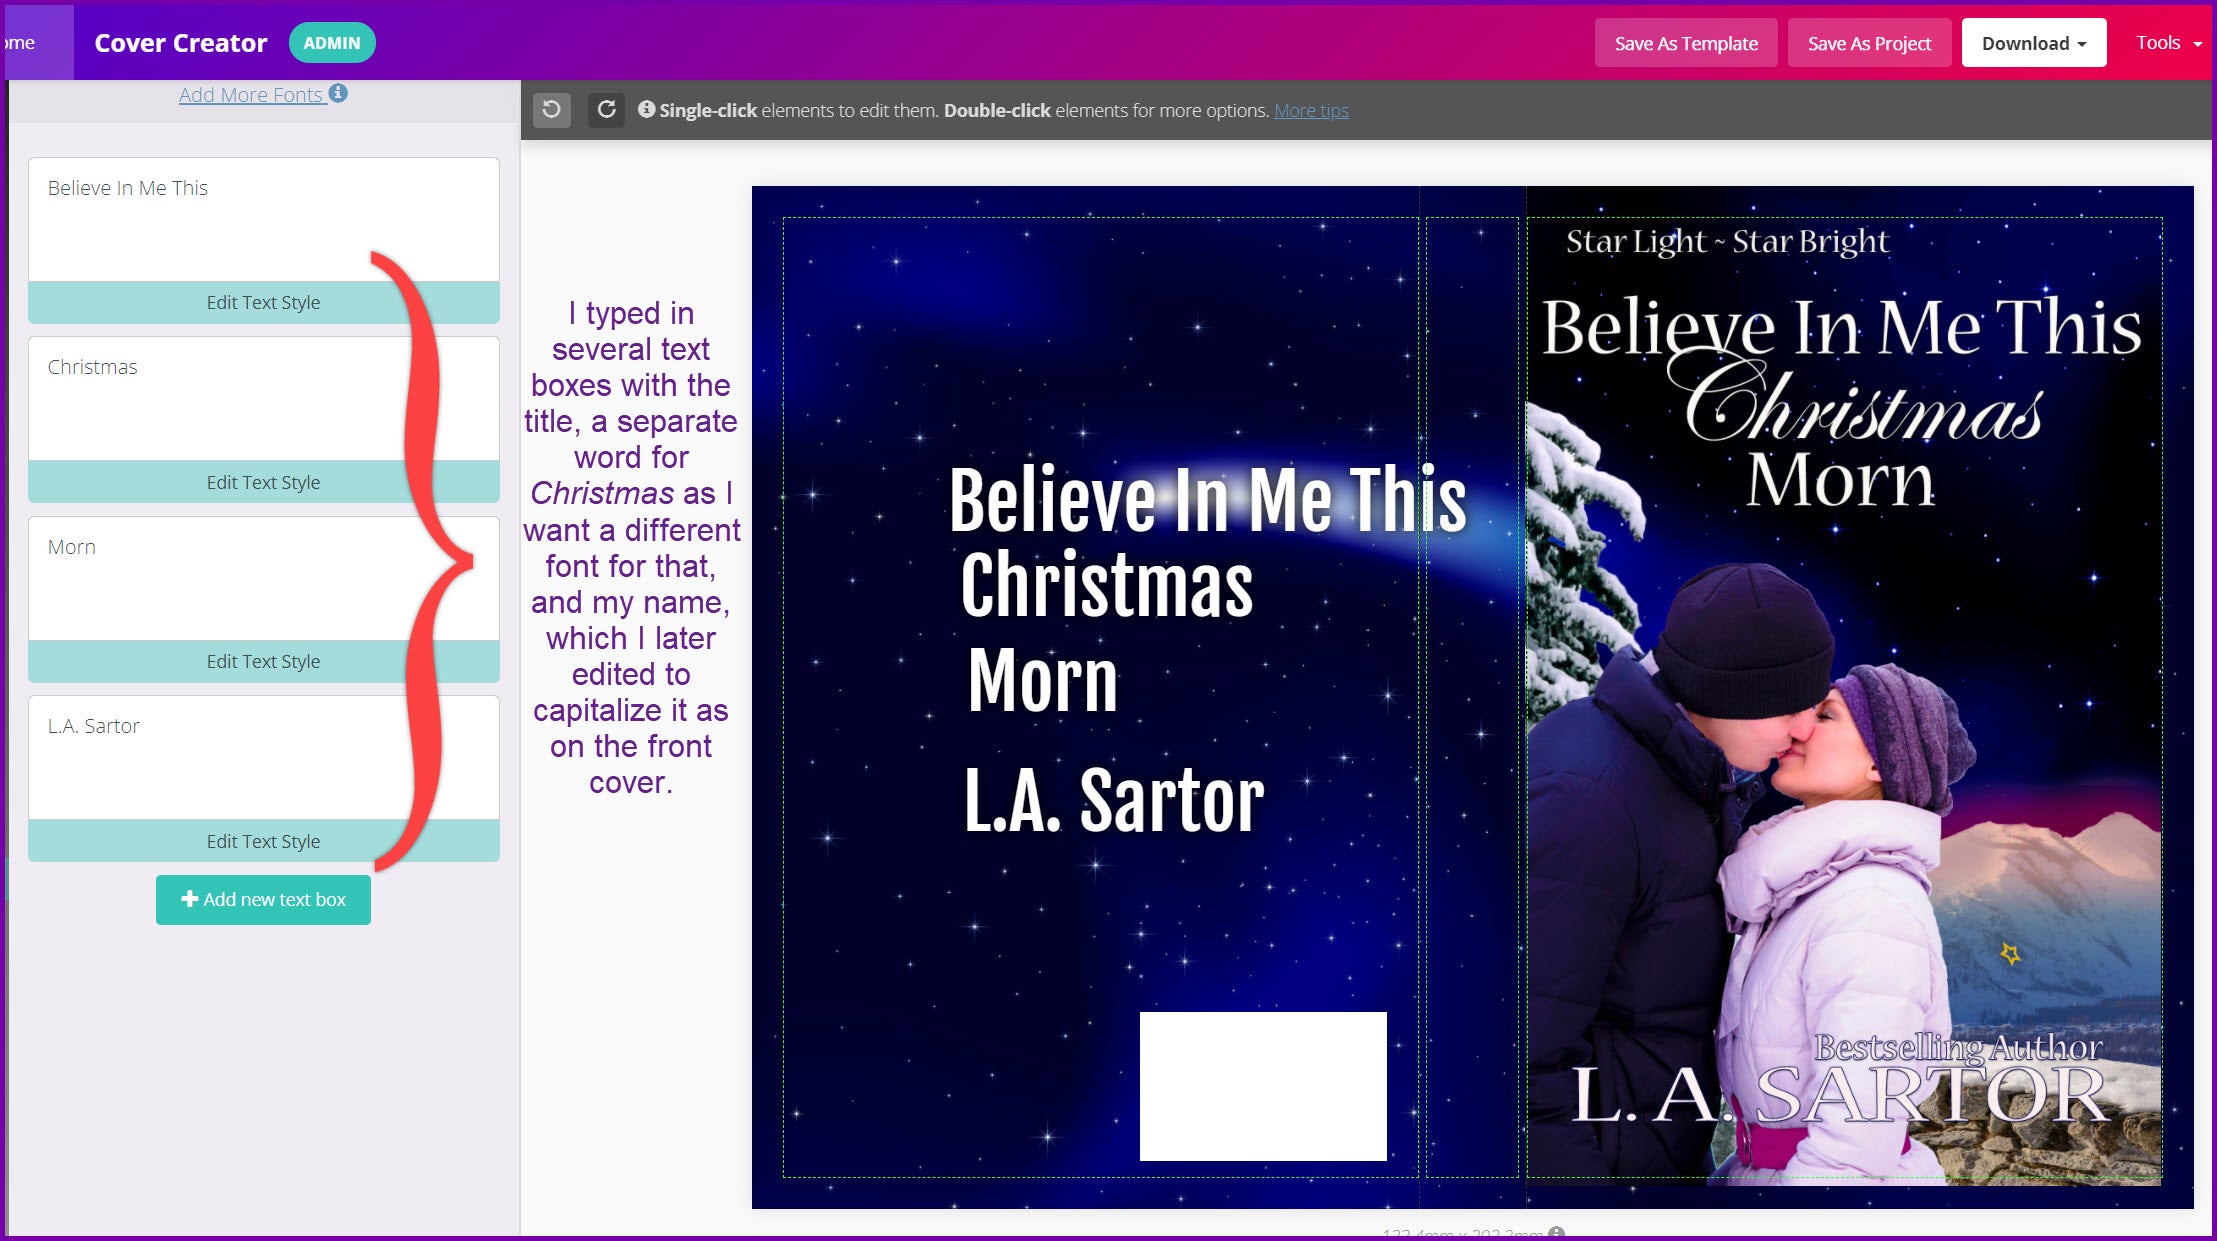
Click on image to enlarge
I then edited them with the fonts I imported into Book Brush which echo the cover’s fonts.
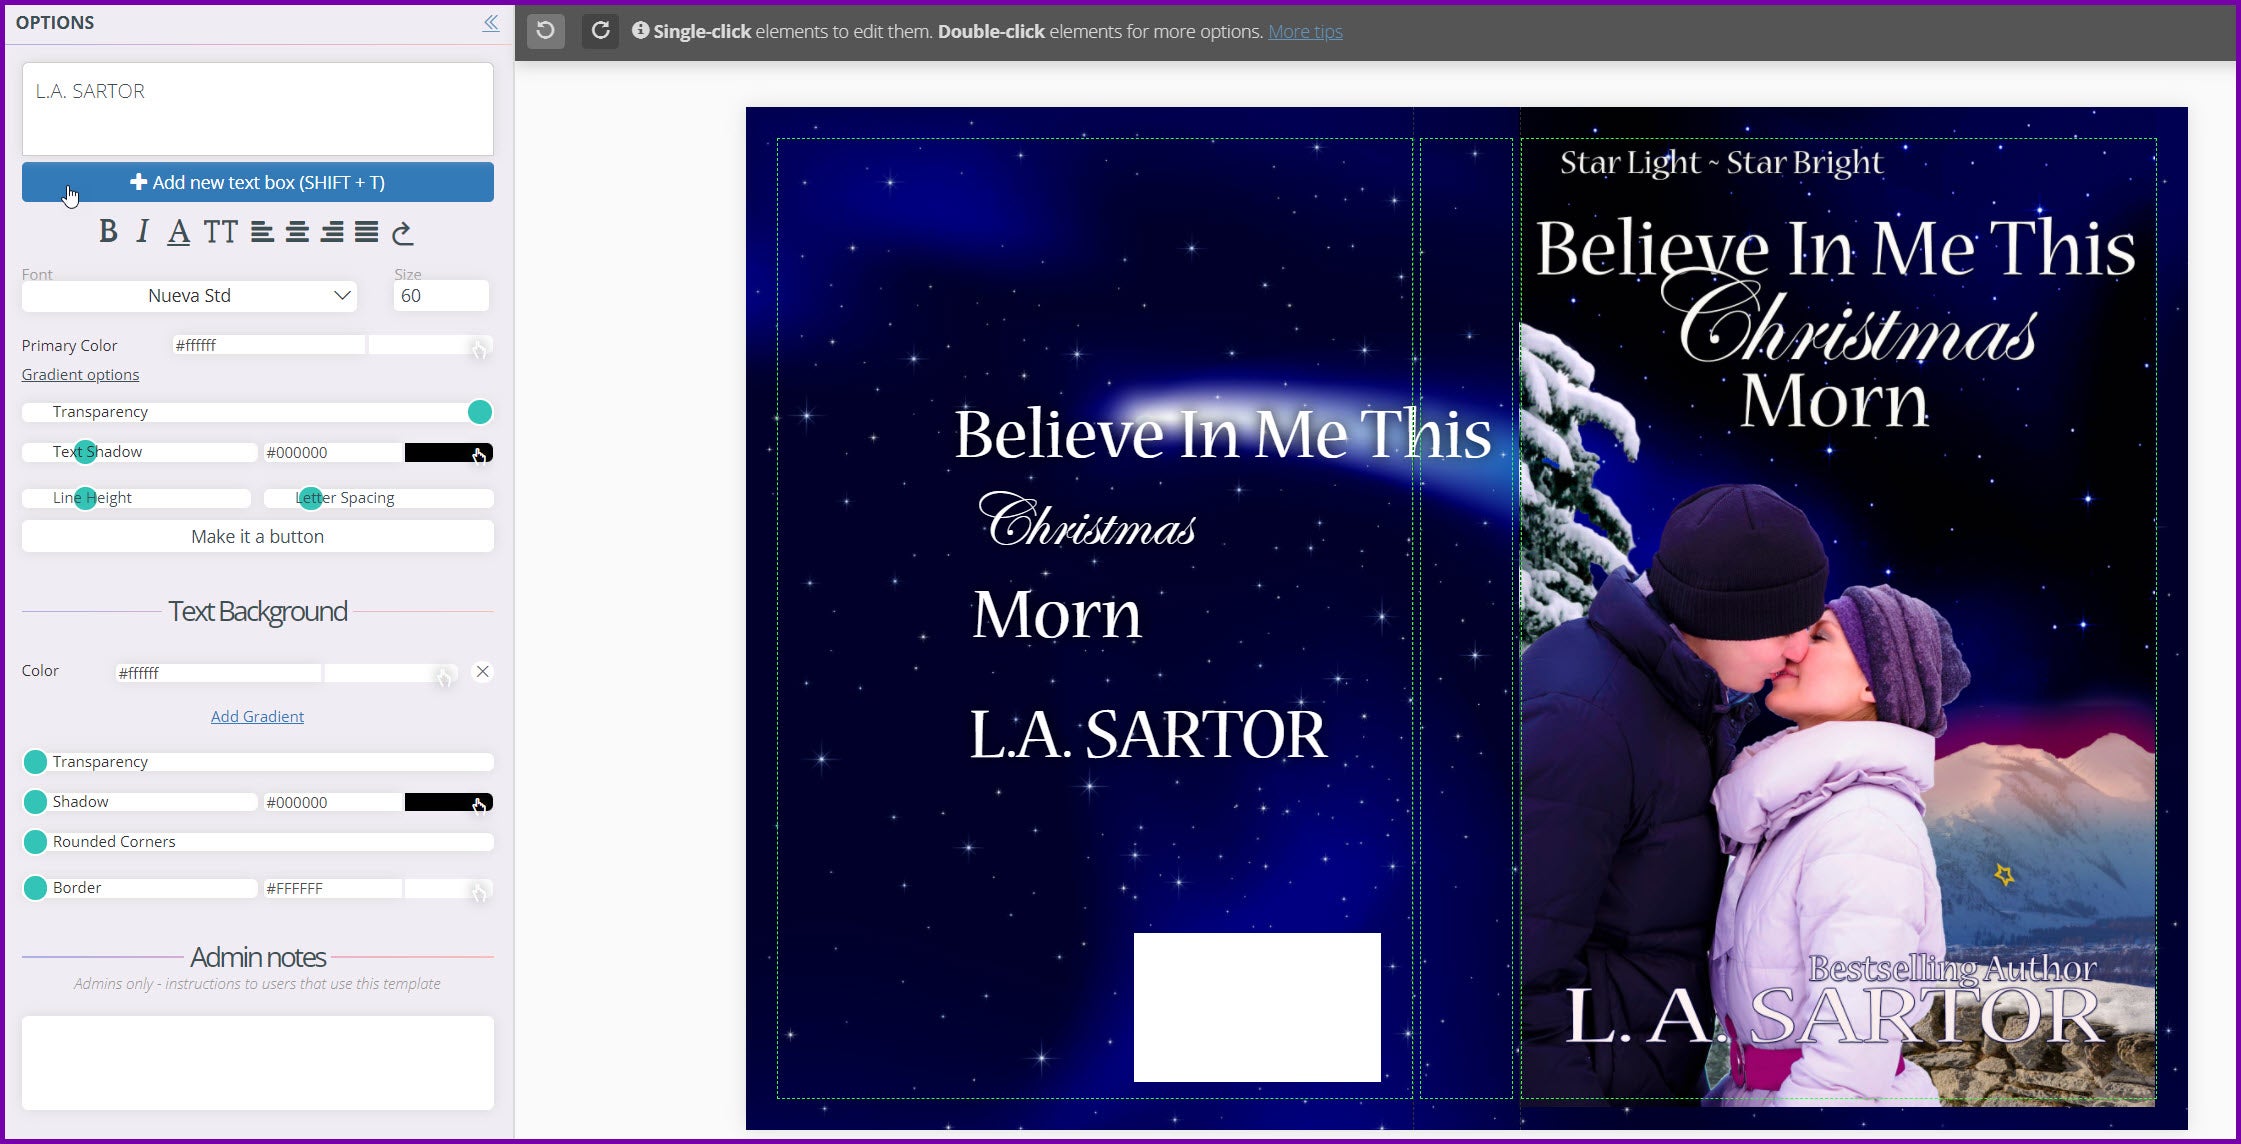
Click on image to enlarge
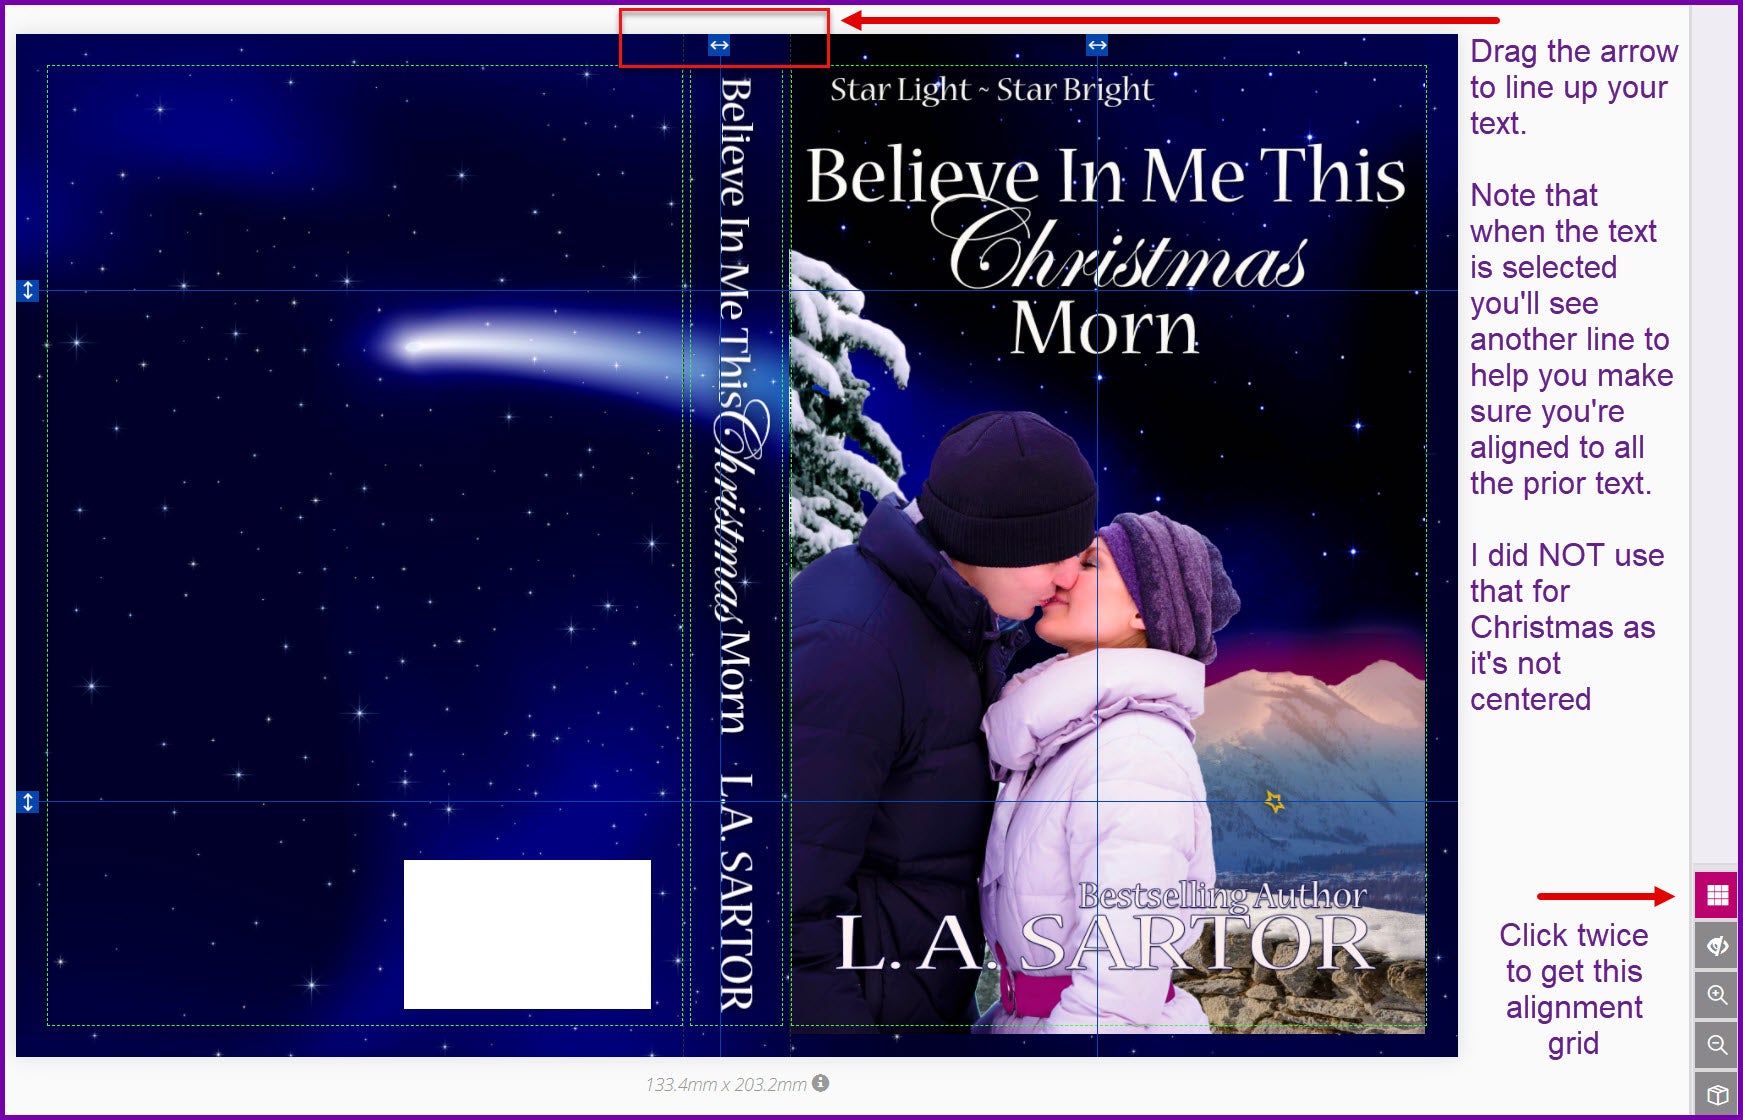
Now, I’ll rotate each one and place it on the spine, then make size adjustments.

Click on image to enlarge
- Tip: Use the alignment grid to help you adjust and center the text. In my case, I used it for every word except Christmas and manually eyeballed that one.
Click on image to enlarge
After seeing how the spine text looks, I will adjust the spacing on Christmas or make the text smaller. All easily doable in Book Brush.
- Tip: Be sure to save your work and then update it as you make changes.
Here is the final copy with the bleed showing (we want this bleed to be covered in a color, even off white or light gray).
Click on image to enlarge
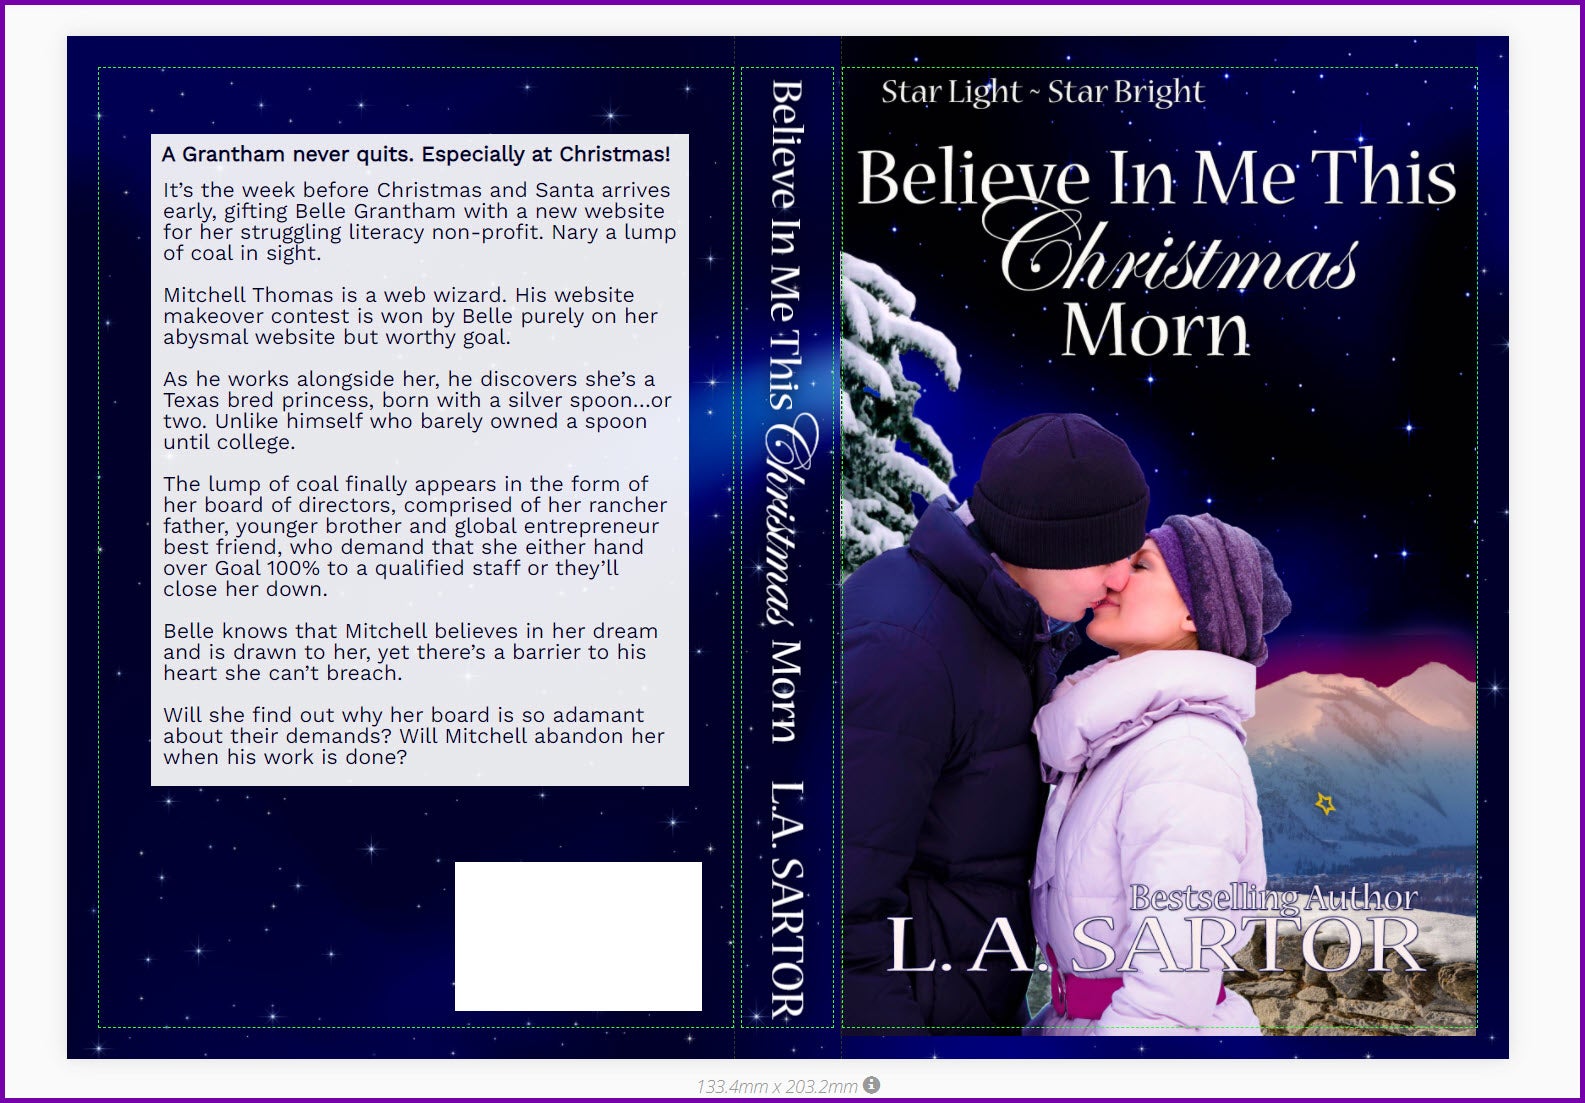
And the final copy I cropped so you can see it without the bleed.
Click on image to enlarge
Notice that I did rotate the background image back to its original shape as the comet was shining through the blurb box too much 😊
My Takeaway:
I used a blurb box on this because the blurb is on the longish side and with the white stars in the background, pure white text died on it. But white text worked just fine on the spine, as there are fewer distractions and bolder text.
Using A Community Template To Start
You can use a template that can make a spine formatting easy (and the back blurb) because everything is already in alignment.
Open the Cover Creator tool and choose templates first.
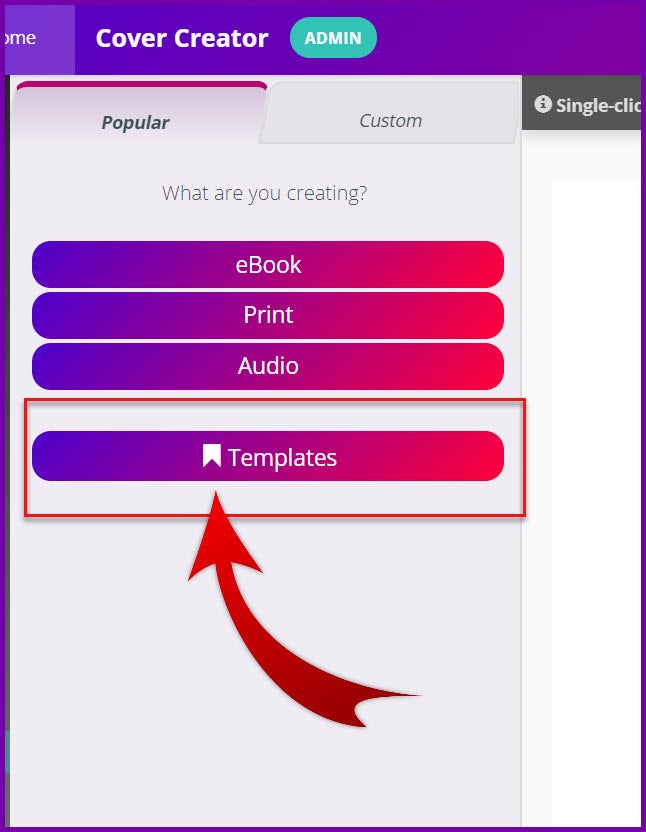
Click on image to enlarge
Then filter to PRINT
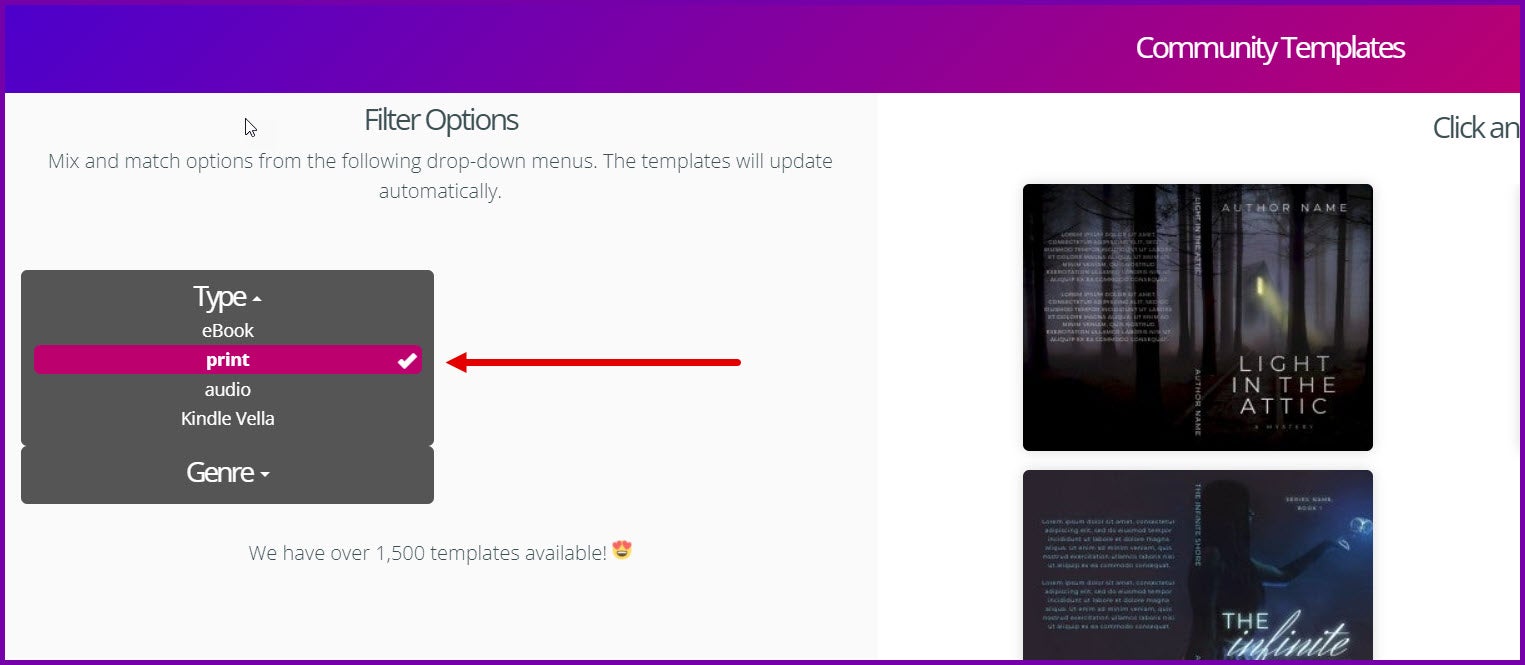
Click on image to enlarge
I was looking for a cover background that would work with my already made ebook cover. While I didn’t find exactly a match, I found one I thought I could work with.
- Tip: Look for a spine font/layout you like as well as you search through them. That maybe be exactly what you want, the rest as you’ll see below, is editable.
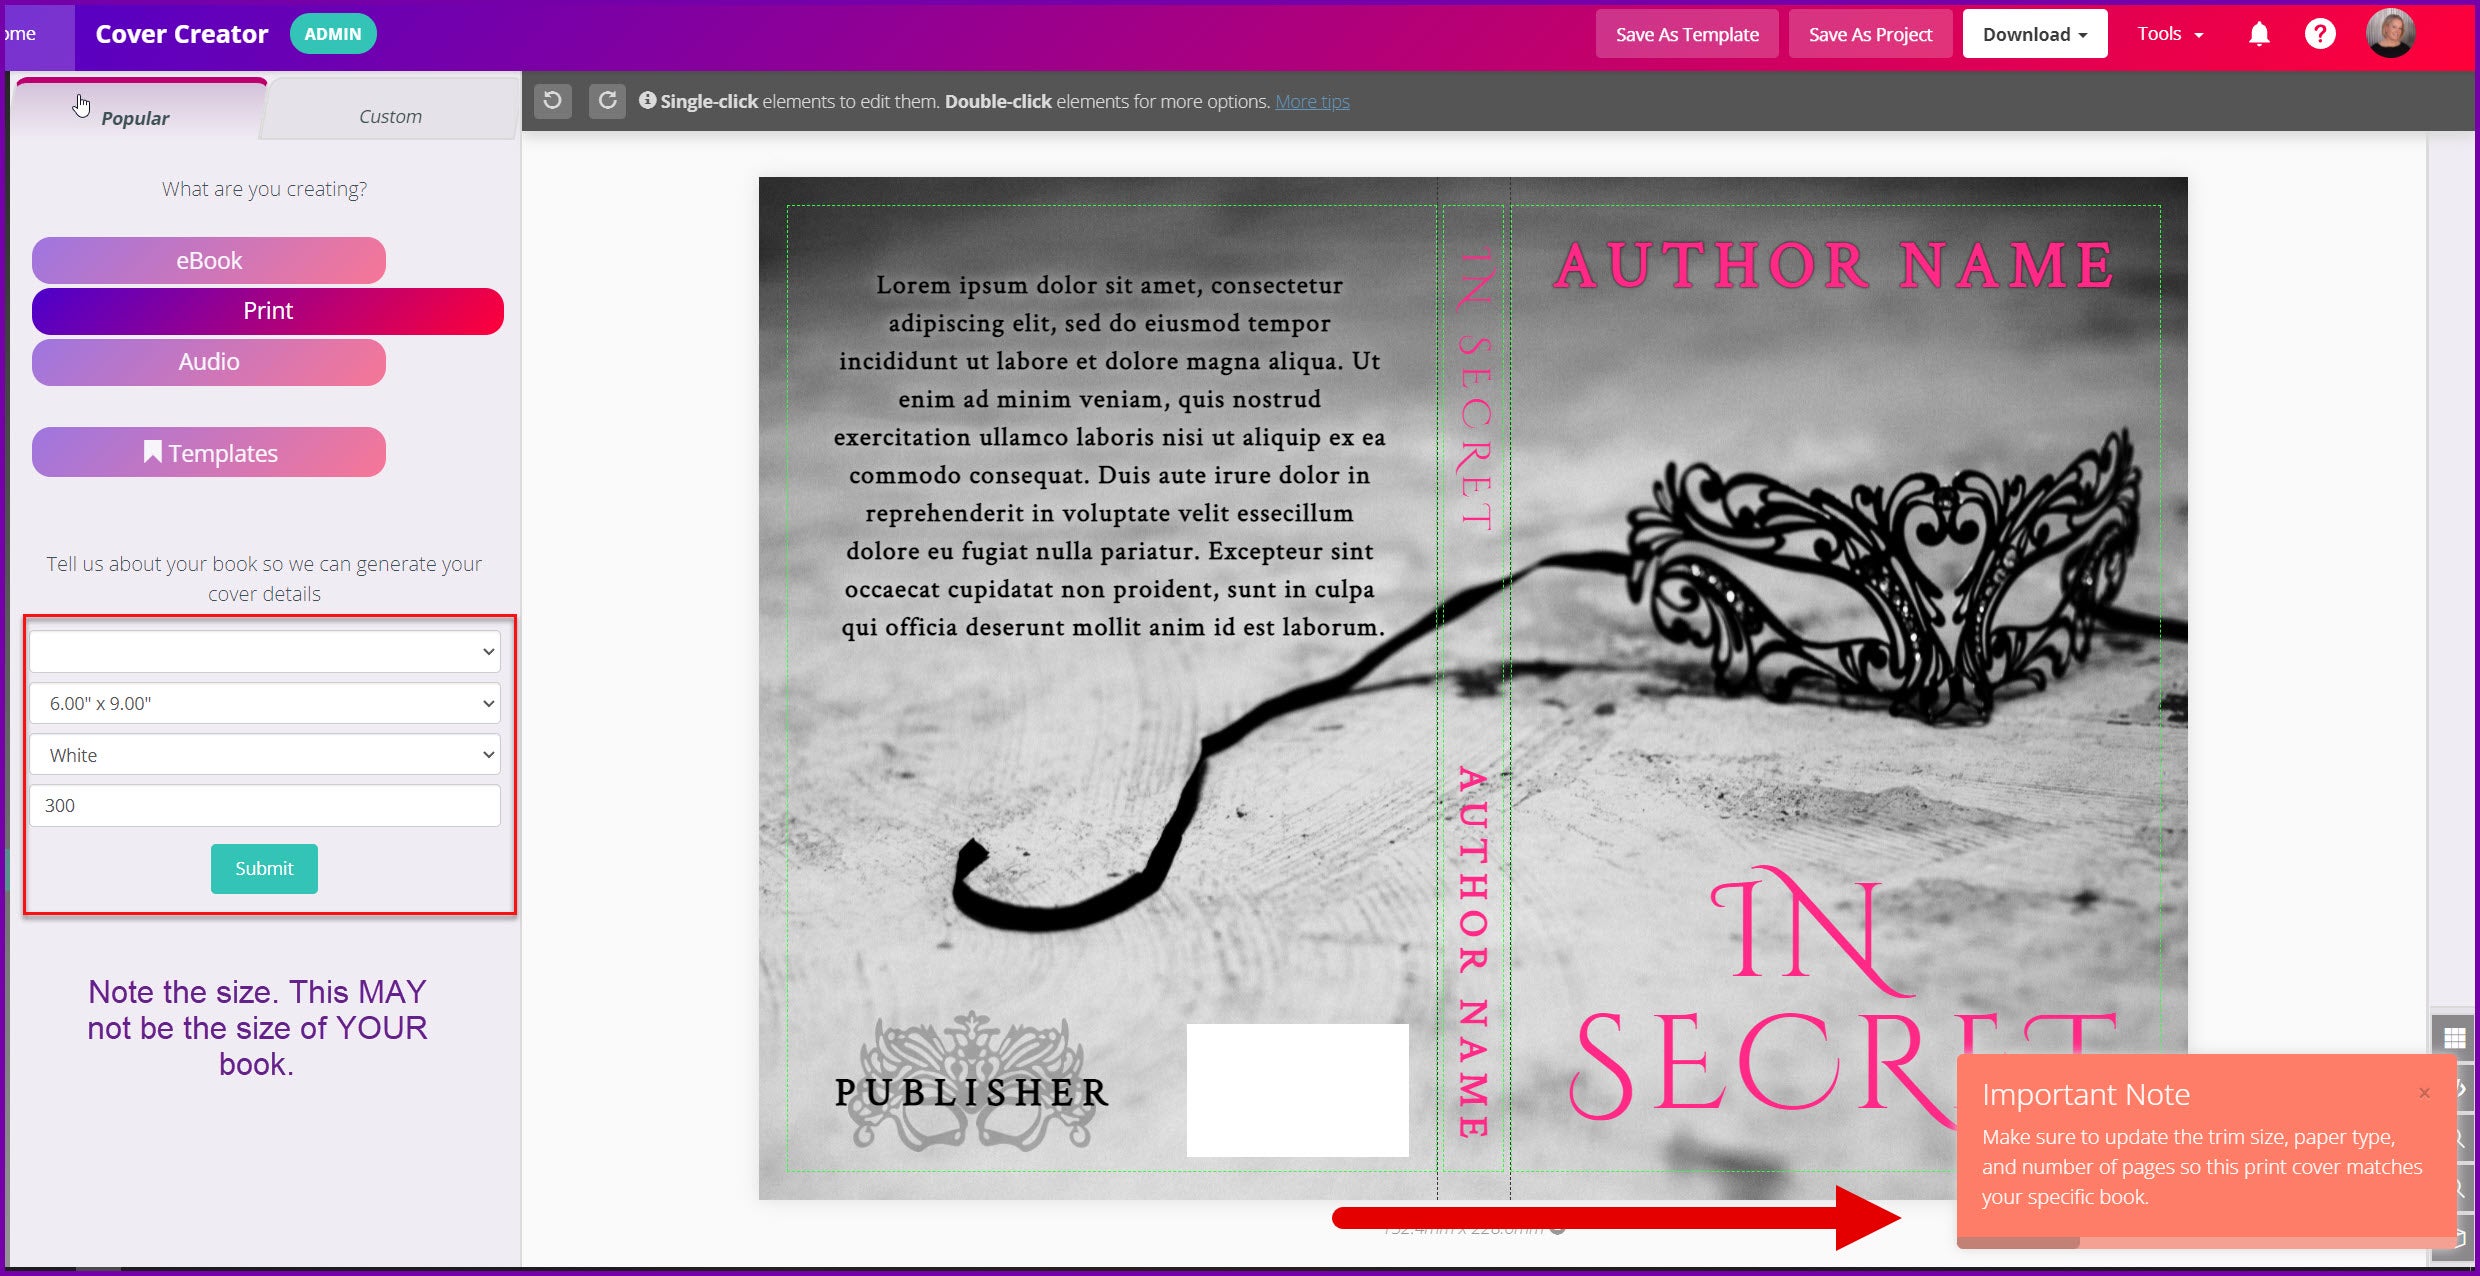
Once you’ve selected one, you’ll get this warning box after it opens on the screen! Do. Not. Ignore. It.
Click on image to enlarge
Now you can fill in your information and the book will be sized appropriately once you hit submit.
Click on image to enlarge
In this image I have the eyeball checked because I want to make sure that all important bleed is covered by the background. And I may want to move the image around and this way I can see the entire thing.
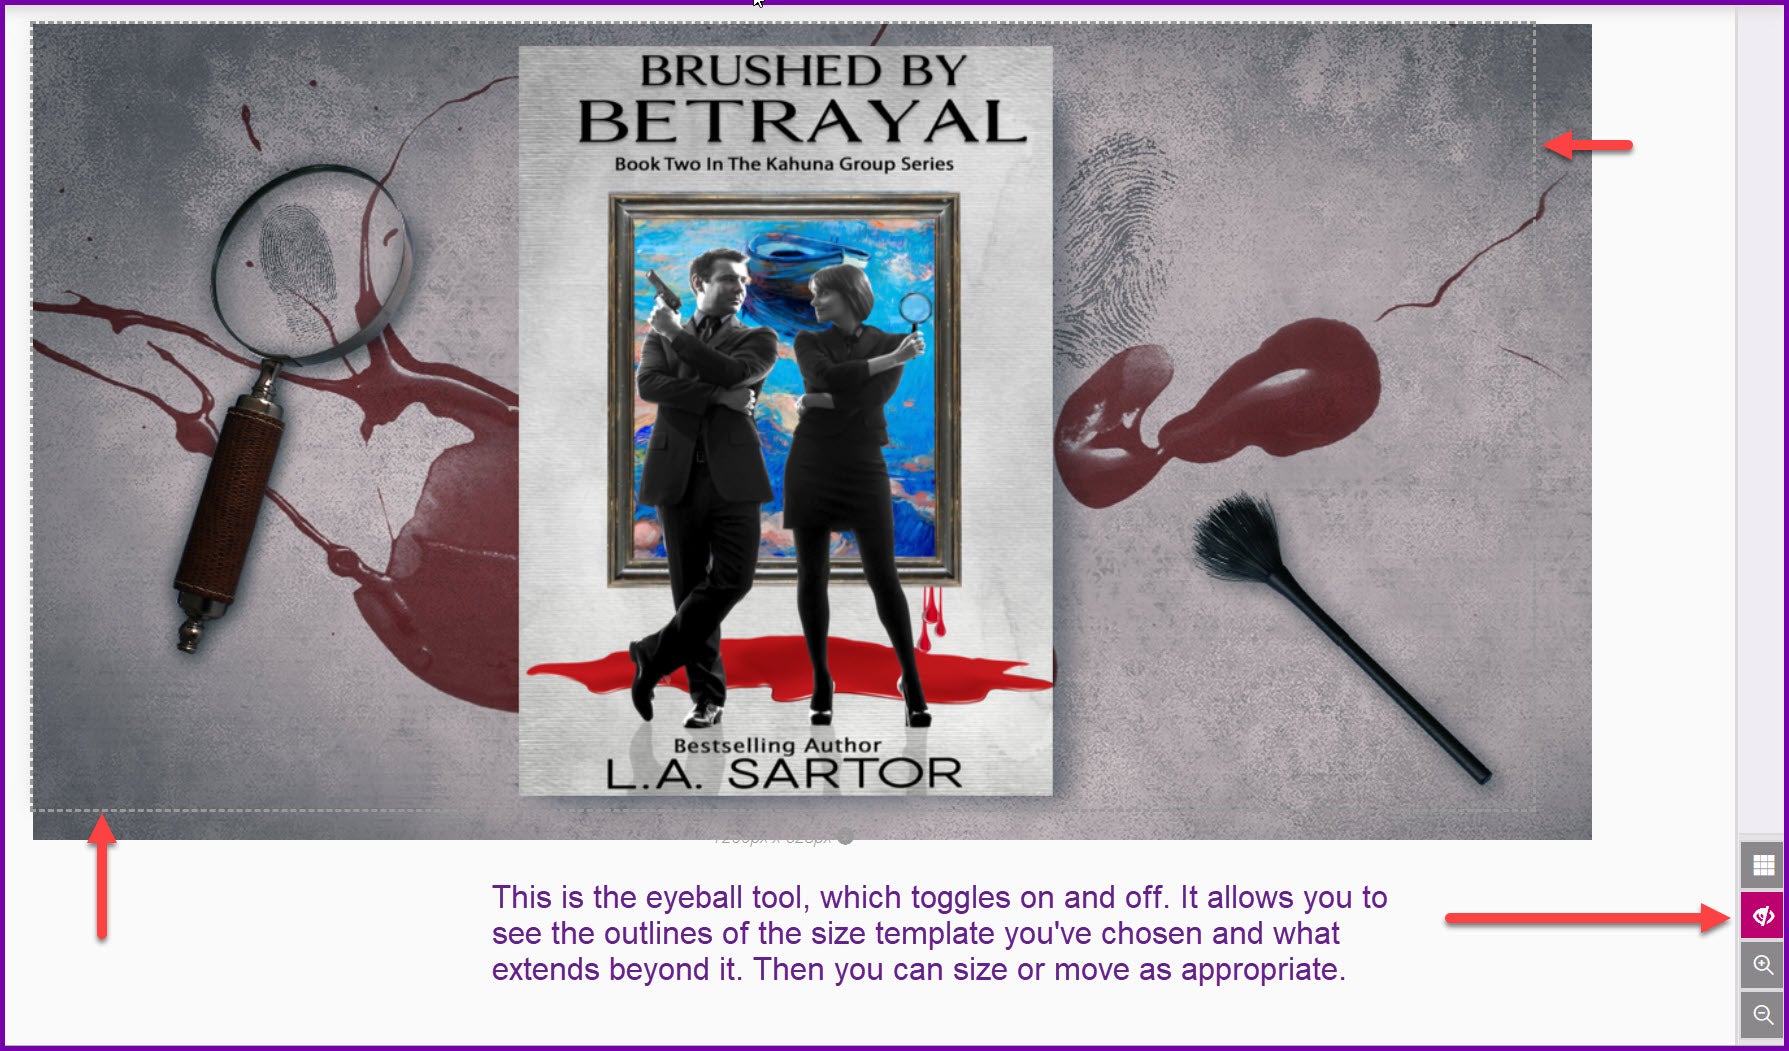
Click on image to enlarge, Eyeball Tool Location
Onward…
Click on image to enlarge
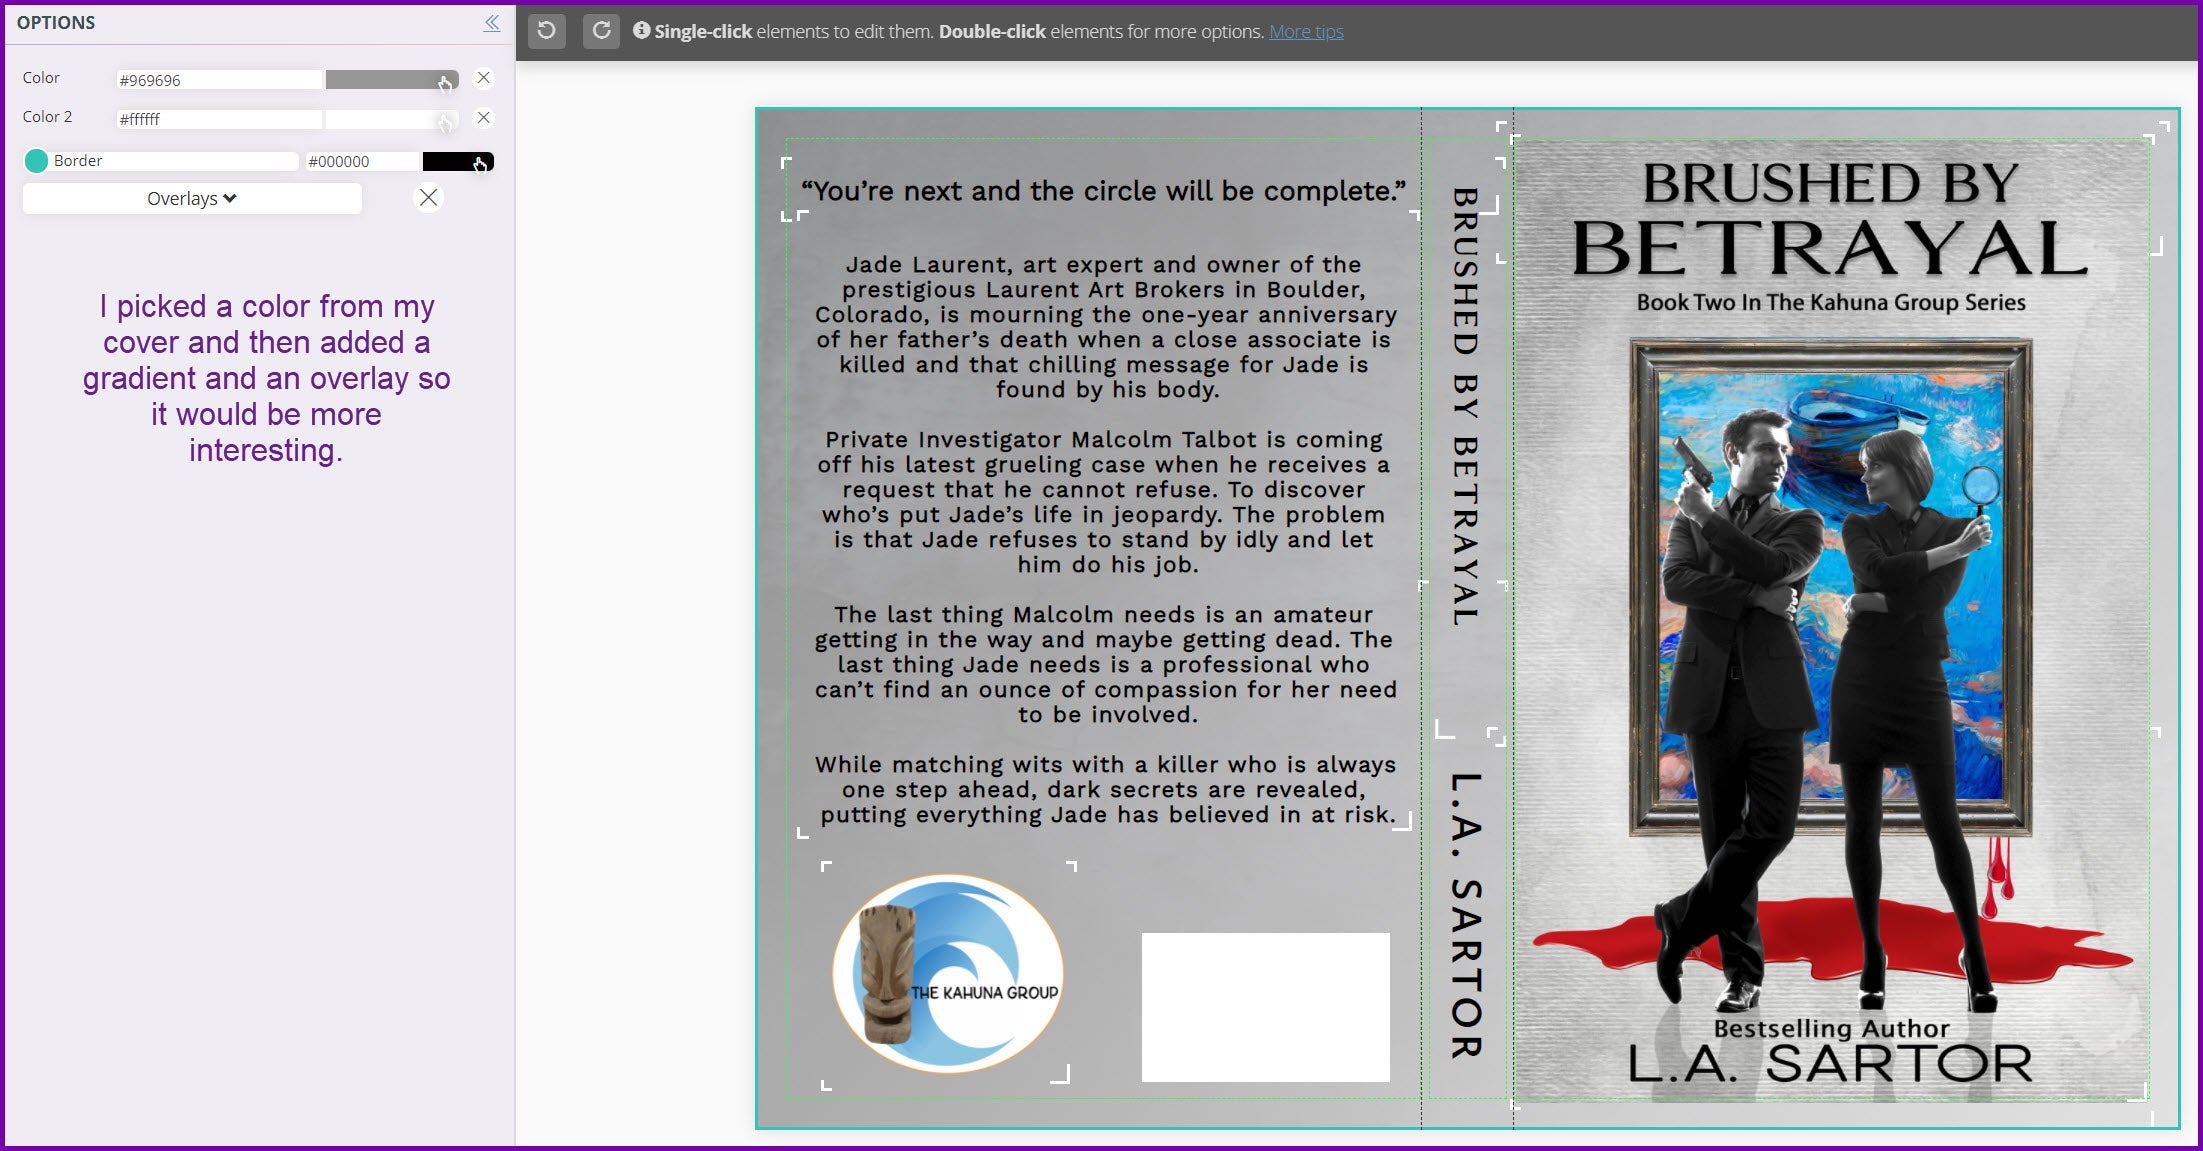
The background isn’t quite what I wanted, but that’s okay because in Book Brush, changing anything is easy.
By clicking on the background, I removed it and added a colored background in its place. Then I added a gradient and an overlay.
Click on image to enlarge
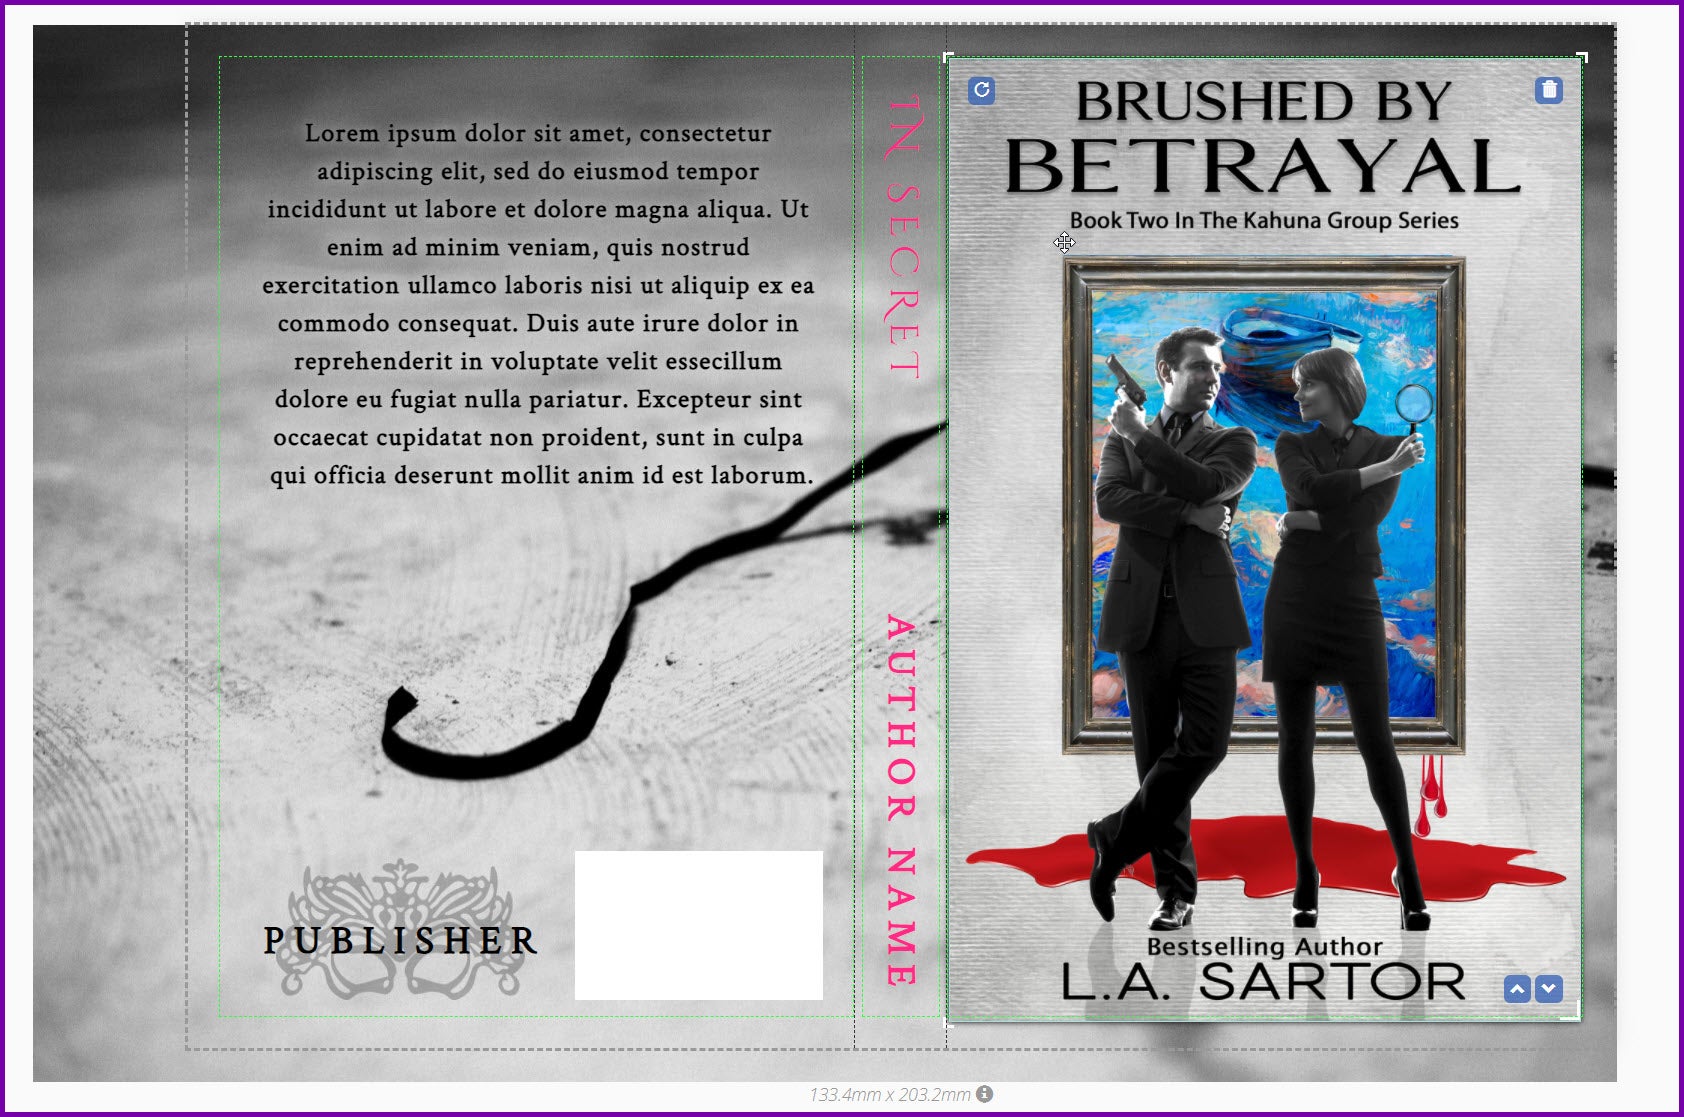
I moved off the template’s cool publisher logo and its text from the back cover.
I added my text to the blurb box. As I usually have the tagline in bold, I made Made a second text box for the tag line above the blurb.
To edit the spine, I simply clicked on the spine’s title and edited the text and font. Then the same on the author name. I did change the letter spacing on both. Fast and easy.
The longest time I spent on this was getting the background correct.

Click on image to enlarge
Here it is complete, without the bleed border.
Click on image to enlarge
My Takeaway:
I think the gradient color on the background will keep the fold (if misfolded by the printer) from looking like an error. I realized I spent too much time fiddling around on the color because I wasn’t sure it would work. I need to have more faith in my eye.
Adding the series logo to the back added an extra bit of color and style. Think about creating logos for your series in … Book Brush, ’natch.
As an aside, a person asked if me they could create a spine in the Boxset Creator and save it to use. Nope, totally different Creators.
Final Words:
You might not think spines are important especially as bookstores, unfortunately, play a smaller role in book buying public. But remember, most people who buy bound books proudly display them on their most likely crowded bookshelves … spine out. Don’t neglect this part of your book’s cover and the marketing potential it has when folks do see it. Look at your own shelves to see if I’m right.
 Article by L.A. Sartor

I started writing as a child, really. A few things happened on the way to becoming a published author … specifically, a junior high school teacher who told me I couldn’t write because I didn’t want to study … urk … grammar… That English teacher stopped my writing for years.
But the muse couldn’t be denied, and eventually I wrote, a lot. I learned a litany of new things and published my first novel. My second book became a bestseller, and I’m absolutely on the right course in my life.
Please come visit me at www.lasartor.com, see my books, find my social media links, and sign up for my mailing list. I have a gift I’ve specifically created for my new email subscribers.