People still love bookmarks. E-readers haven’t taken that opportunity away from us authors. We all still have books, novels, cookbooks, reference books, etc. and they still need marking.
So why not make sure that when they open up that marked spot, they remember you!
After deciding what you want to promote: yourself, a current book or series, or a freebie link and author page, we can dive into the creating part.
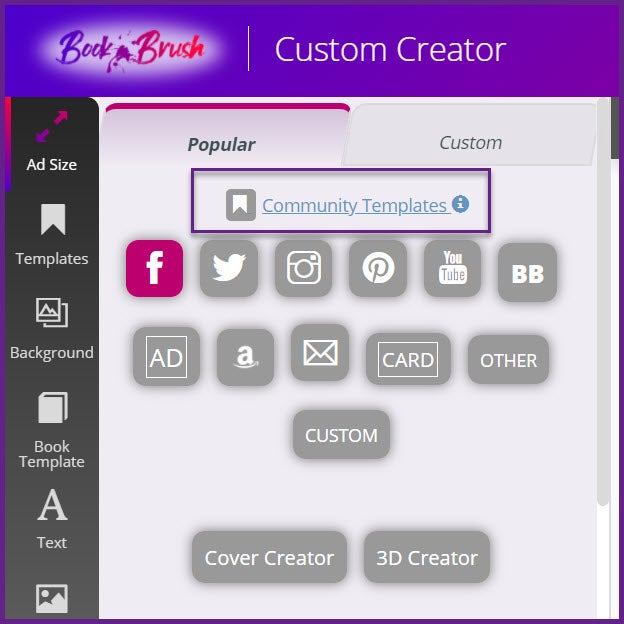
1. USING COMMUNITY TEMPLATES
Book Brush makes this easy-peasy with Community Templates.
click on image to enlarge
In the Custom Creator Tool, just click on Community Templates.
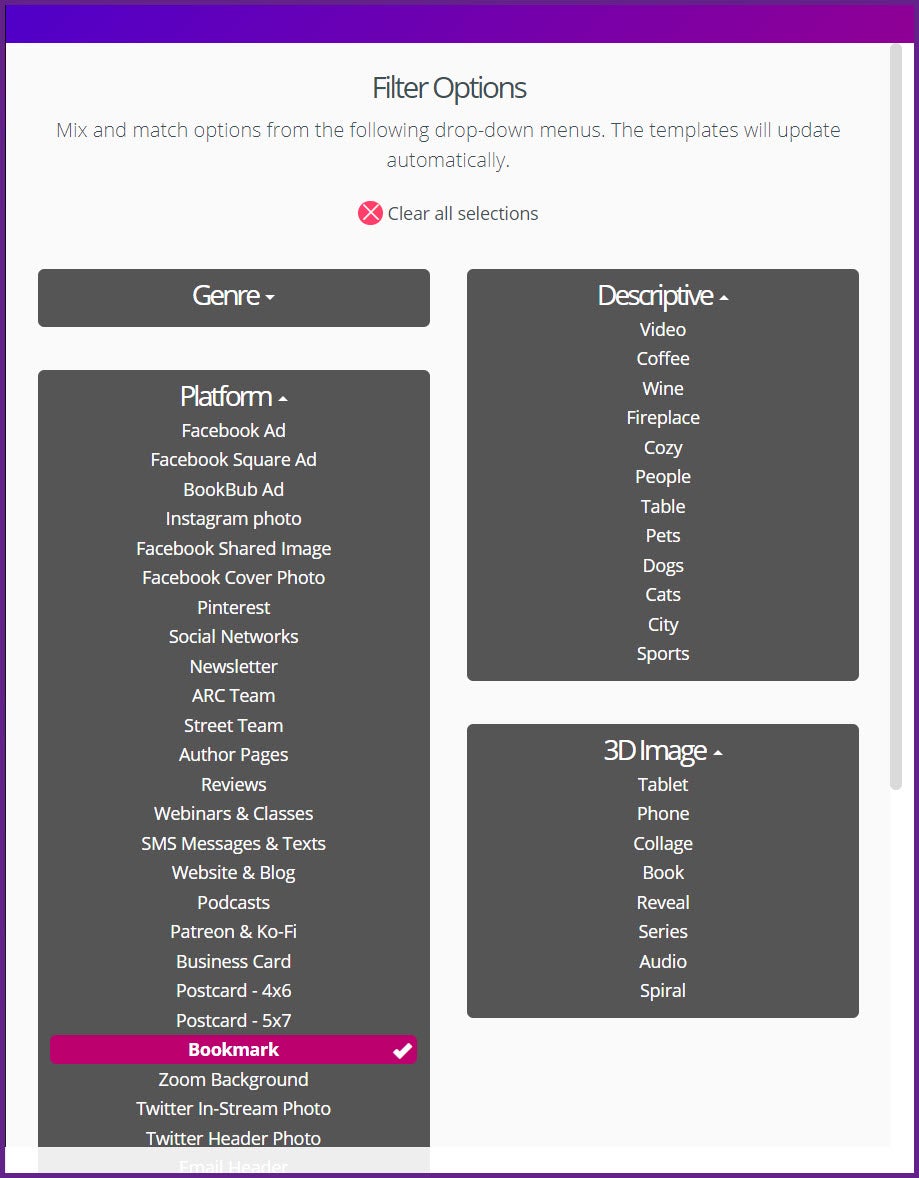
- Then the Filter Options Box come up.
- Under Platform choose Bookmark.
click on image to enlarge
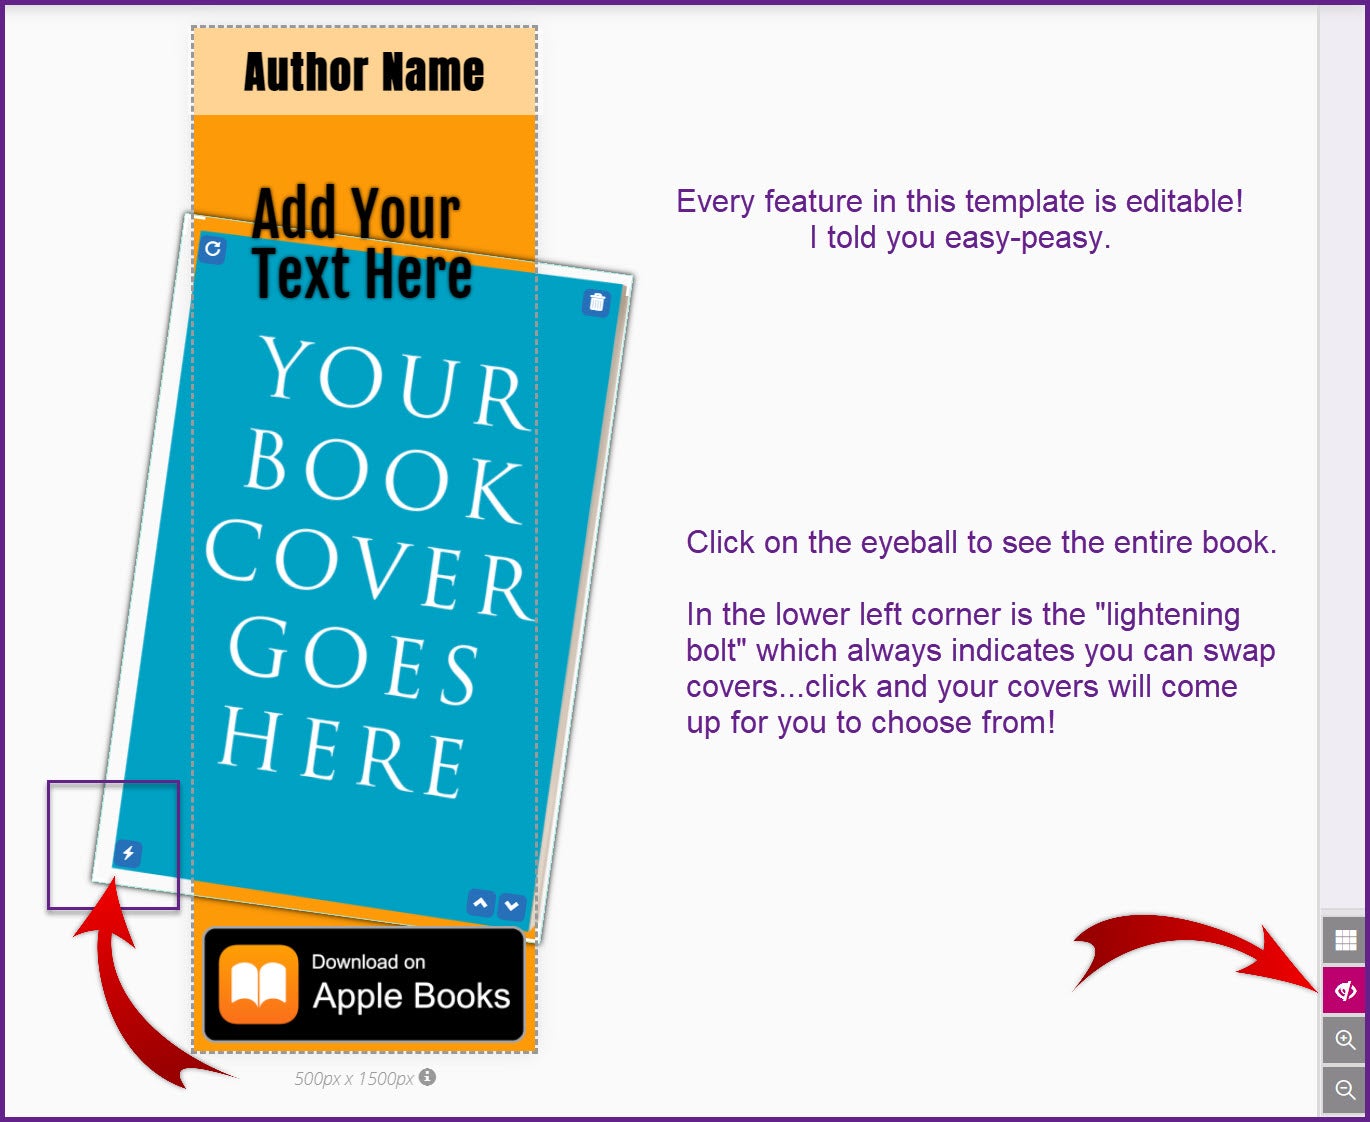
Currently, there are 48 templates to choose from, scroll through and have fun. Some have a Blue “Your Book Cover Goes Here”.
To add your cover, simply click the lightning bolt in the lower left, your covers will come up. Click one and it magically appears.
click on image to enlarge
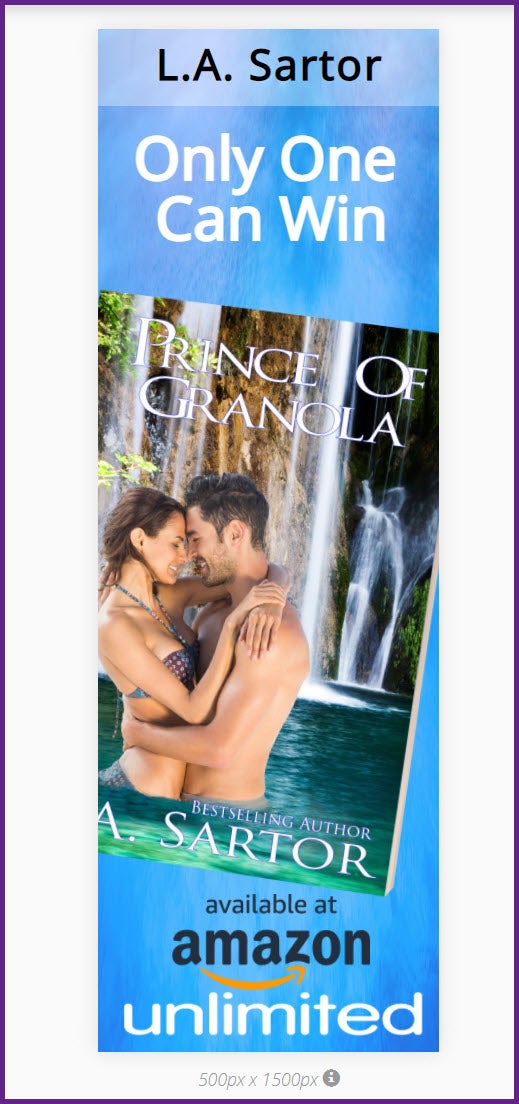
I had this template altered in a few minutes! Each object is editable.
click on image to enlarge
I truly only deleted the retailer stamp, changed the background color to a solid blue, added an overlay to that. Added the new retailer stamps and changed the text font and colors.
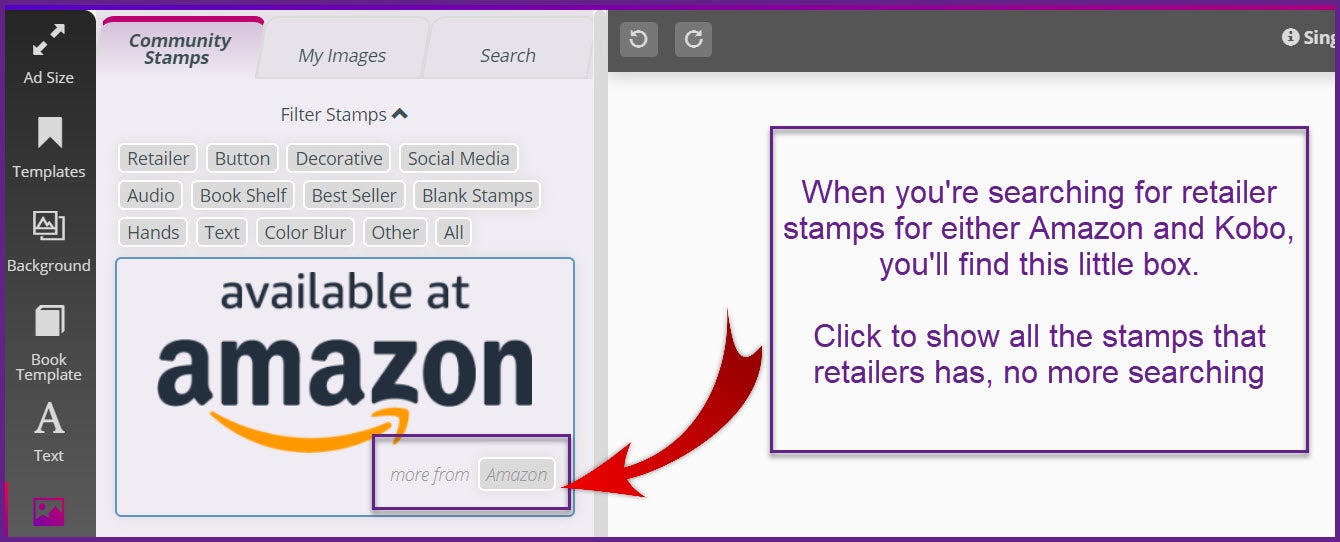
NEW FEATURE ALERT.
Now it’s easier than ever to add your Amazon and Kobo retailer stamps.
click on image to enlarge
2. YOU CAN ALSO ADD A BOOK TEMPLATE TO A COMMUNITY TEMPLATE
If you find a community template that doesn’t have a book cover to change, or want to exchange the one there for a different one, you can do so very quickly.
This is what I started with, again looking at community templates and searching for bookmarks under PLATFORM.
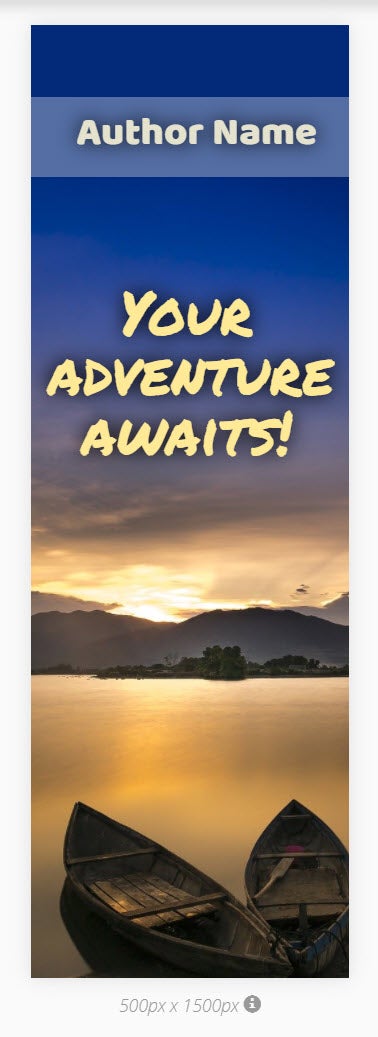
click on image to enlarge
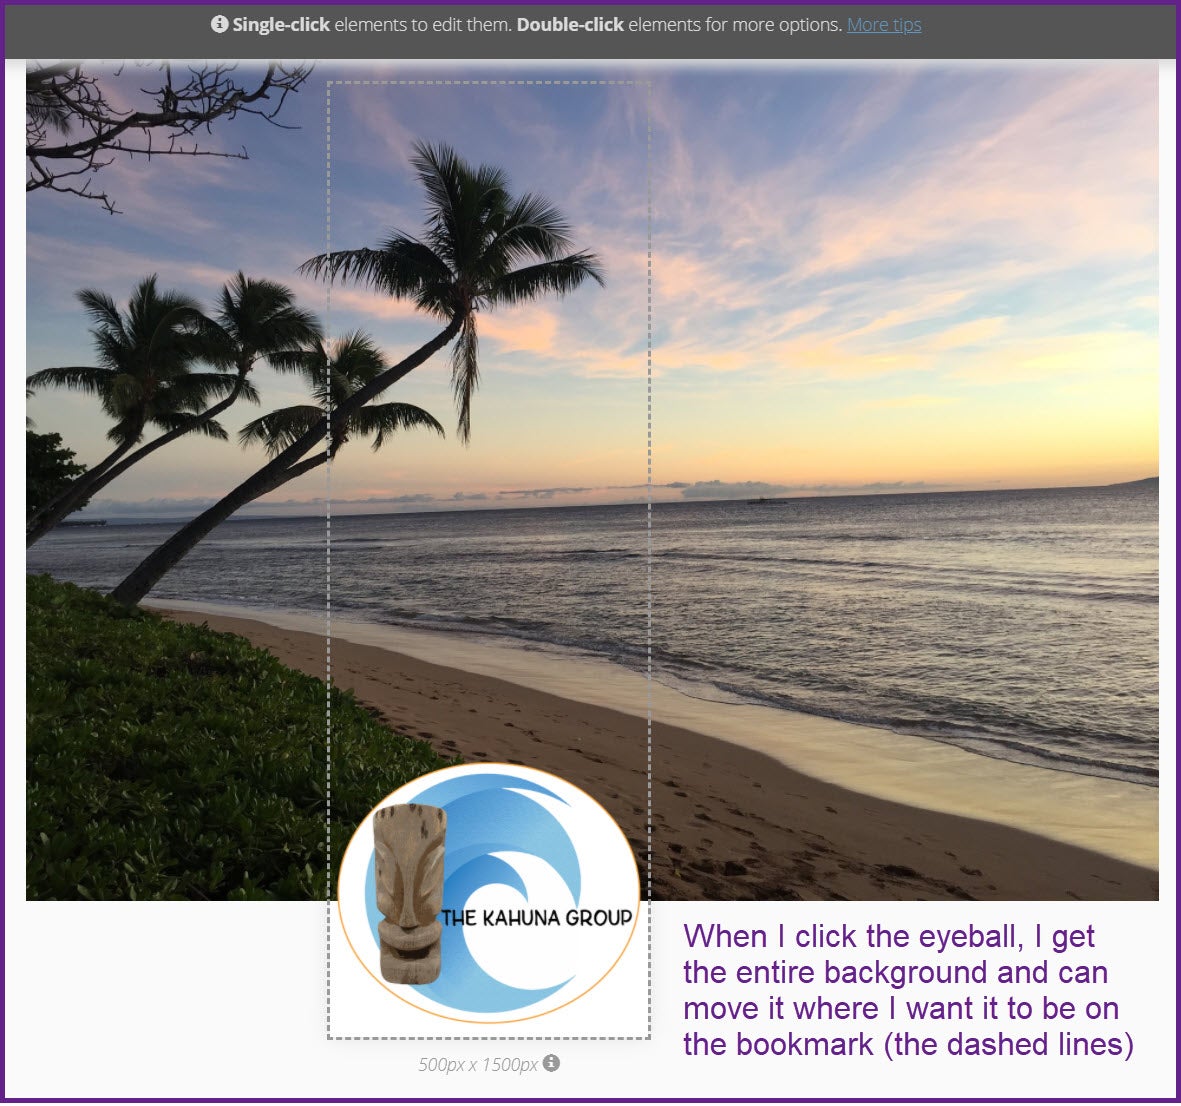
To look at the entire image, I clicked on the eyeball tool and moved the image to where I wanted it.

click on image to enlarge
Here is how I added the book template. Totally magical.
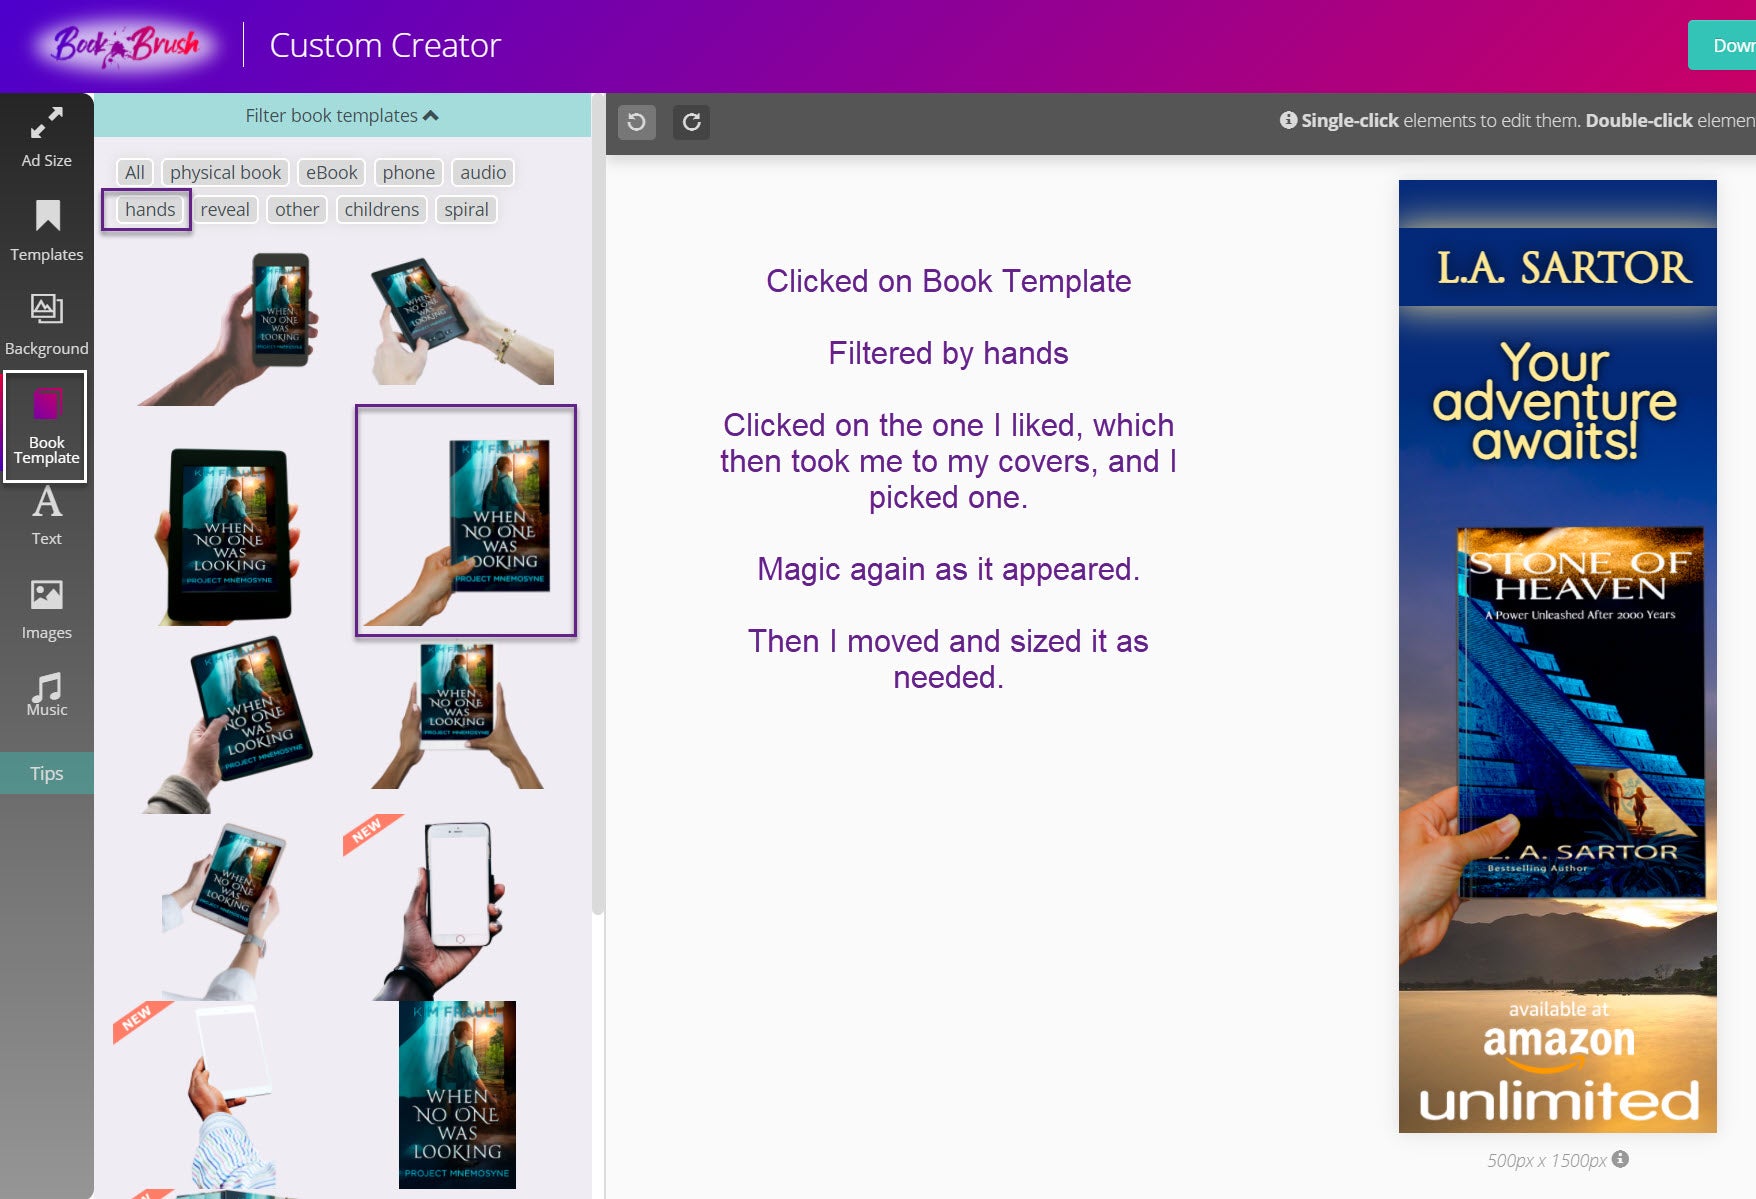
click on image to enlarge
The final product. Nothing like the original and it only took a few clicks.
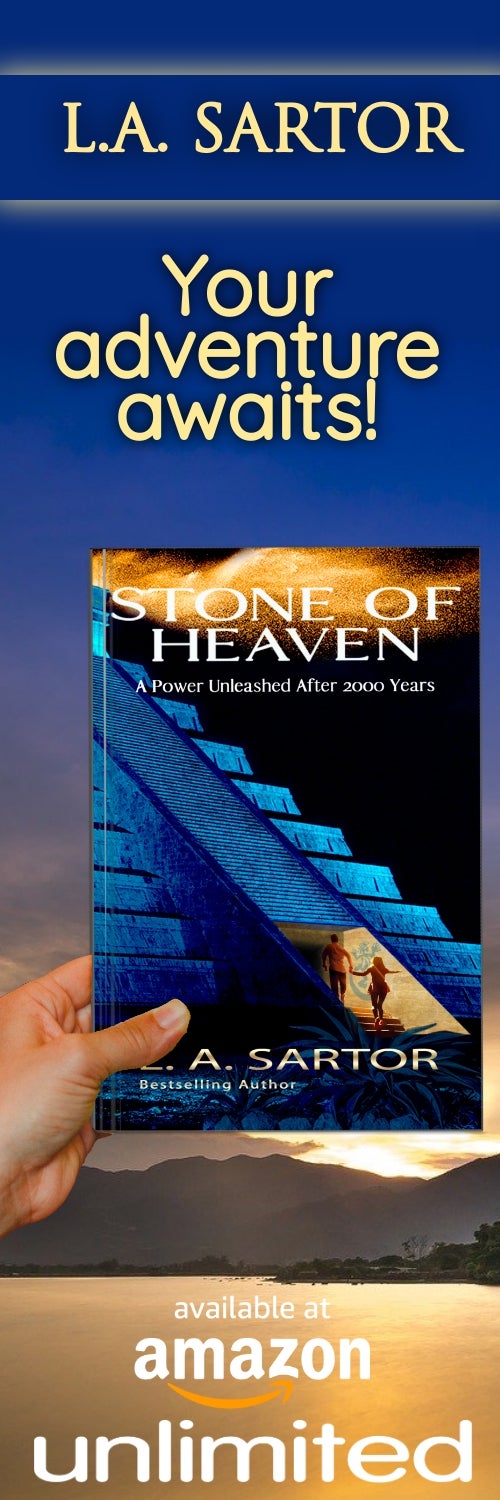
click on image to enlarge
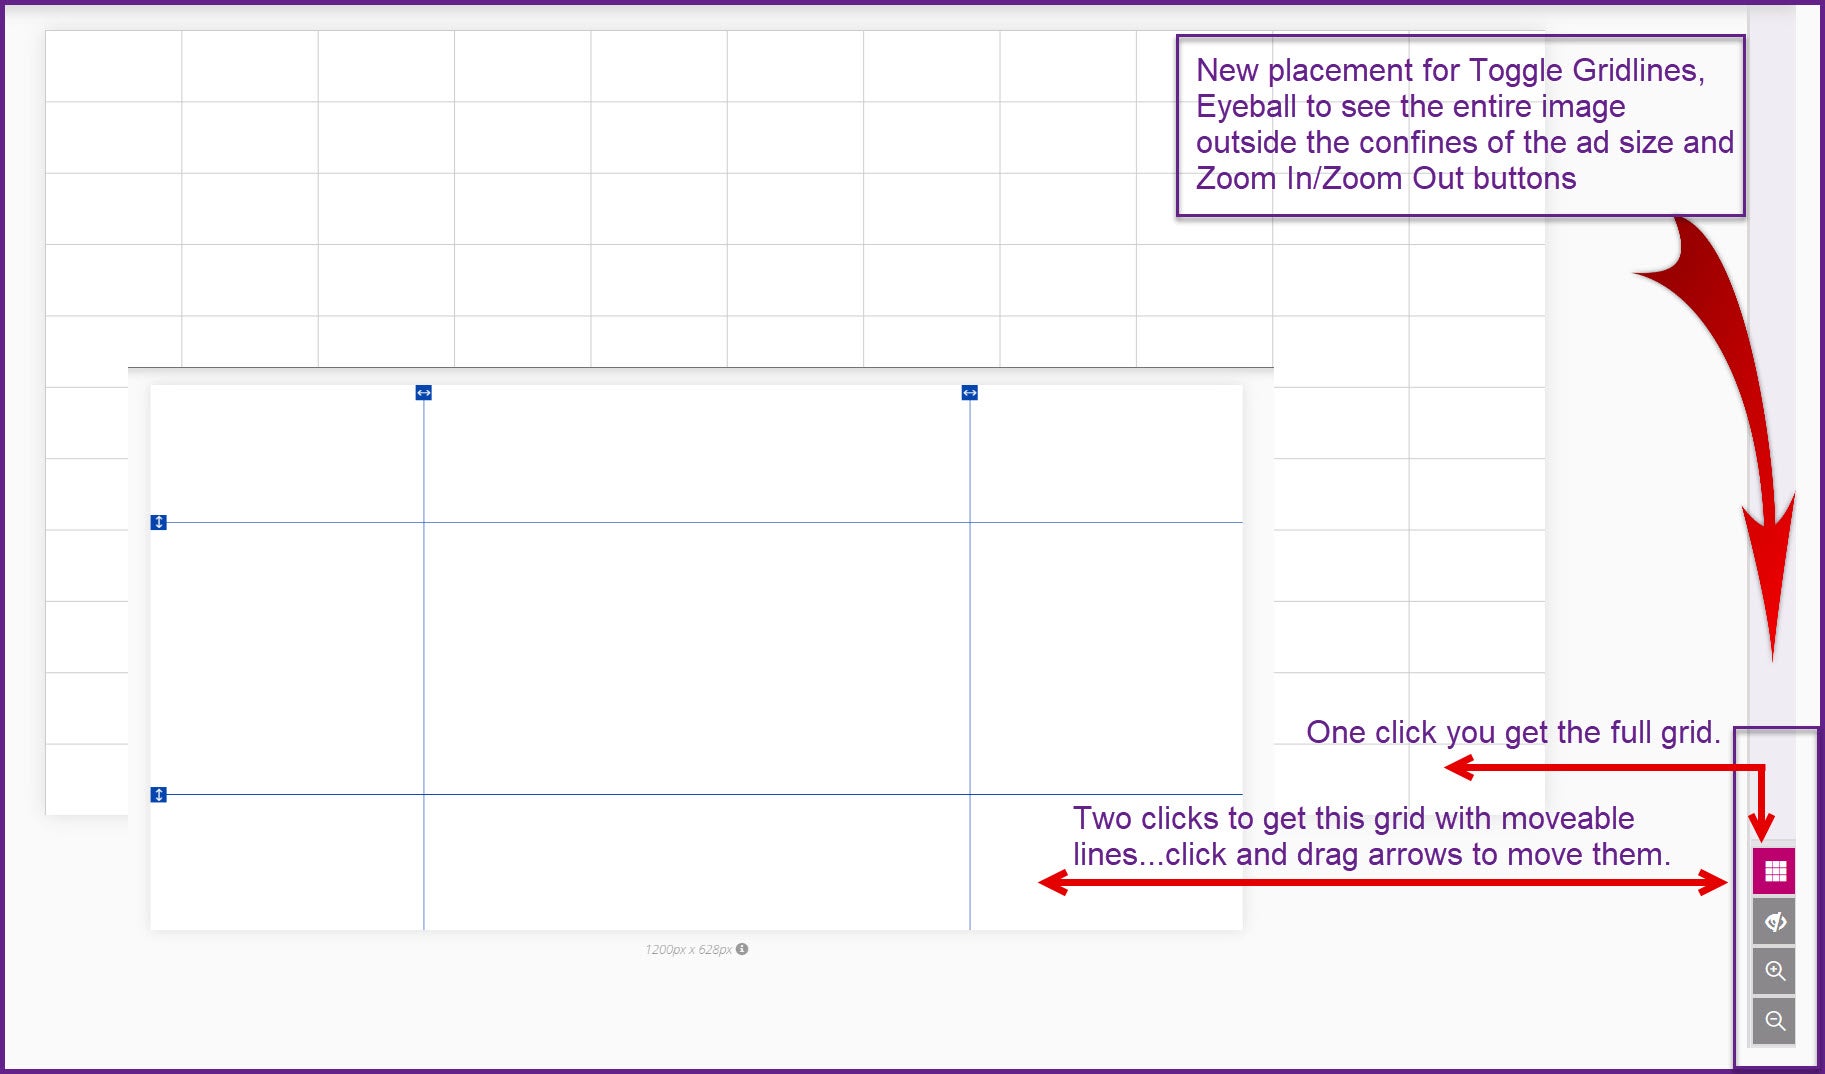
NEW TOOL PLACEMENT
The eyeball, gridlines and a newly added zoom in/zoom out panel has moved to the bottom right of the workspace.
click on image to enlarge
3. WHAT IF YOU WANT TO START FROM SCRATCH
We have two ways to begin.
1. Use our premade template or create your own size.
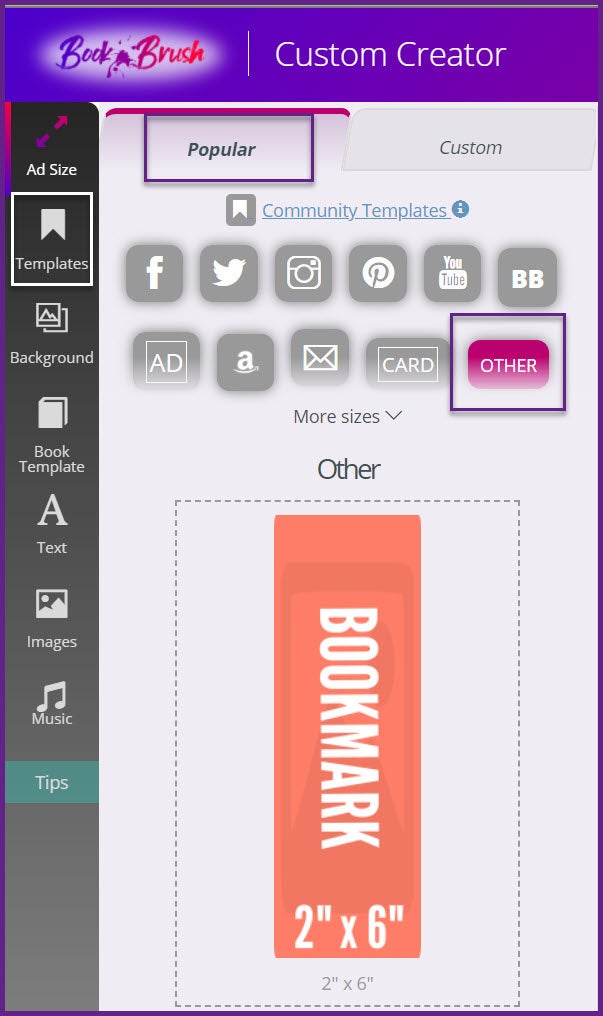
Go to the Custom Creator, then…
- Popular
- Templates
- Other
- Click on Bookmark to bring it into the workspace.
click on image to enlarge
Once the bookmark is in your workspace, you can begin to pretty it up.
Remember you can bring in your own images. For instance, your book cover for a background, logos, signatures, any image you own.
(Remember Stamps have been retitled IMAGES)
click on image to enlarge
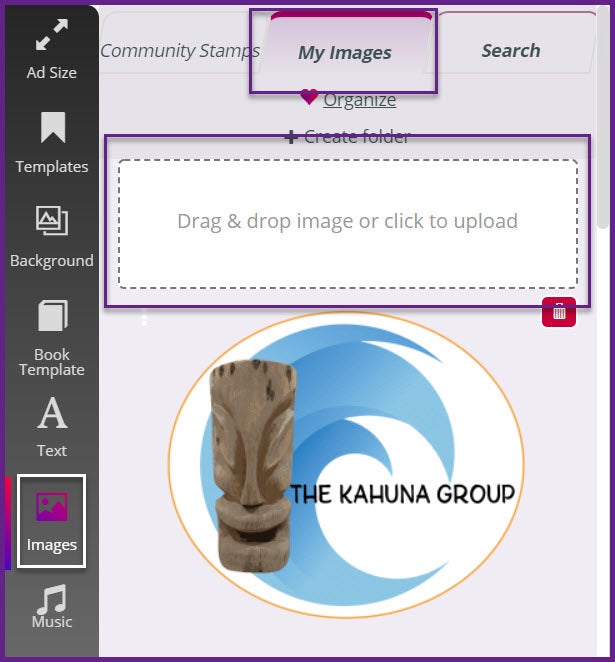
I brought in my logo for the Kahuna Group Series.
- Images in left column
- My Images
- Drag or upload your image.
It’s truly that simple.
click on image to enlarge
Find your background or just add a simple color and start adding your text boxes or other images.
For this bookmark, I just want people to know I have a series that, by the logo and the background, appears to be set in Hawaii and my name and website.
Now I can print these on my home color printer and cut out or send to a professional printer or use with a promotional company (who may have their own sizes…) or using blanks you buy either an office store or on line. I buy mine from pcforms and they will send you samples and a template to use.

click on image to enlarge
Which brings me to our final way to create bookmarks in a easy-peasy way.
4. CUSTOM SIZES
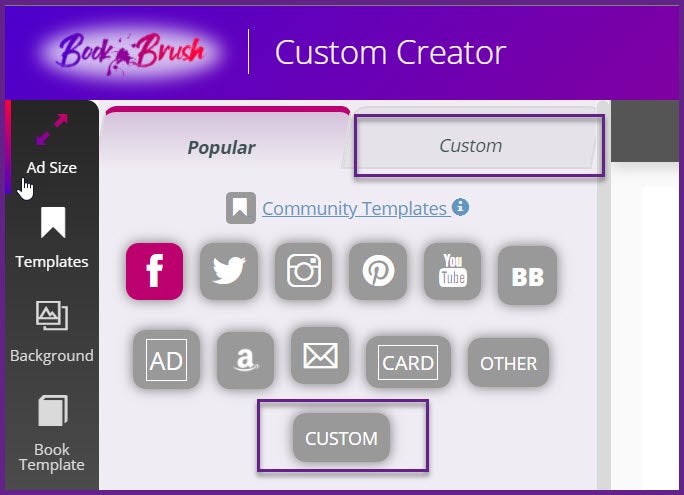
There are two ways to get to custom sizing in Book Brush.
click on image to enlarge
You can click the CUSTOM tab next to Popular.
Or
You can click the CUSTOM button icon.
Either will take you to this page. By the way, this is the panel for making anything a custom size.
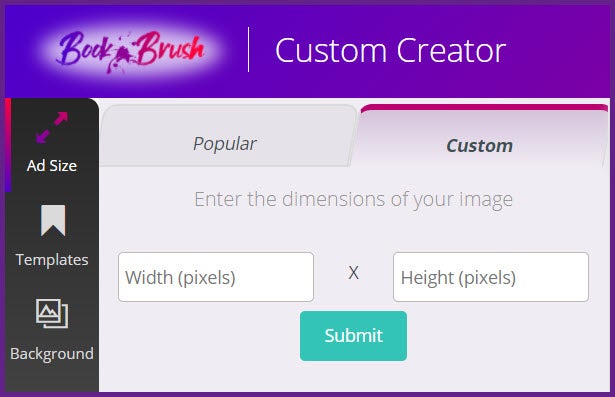
click on image to enlarge
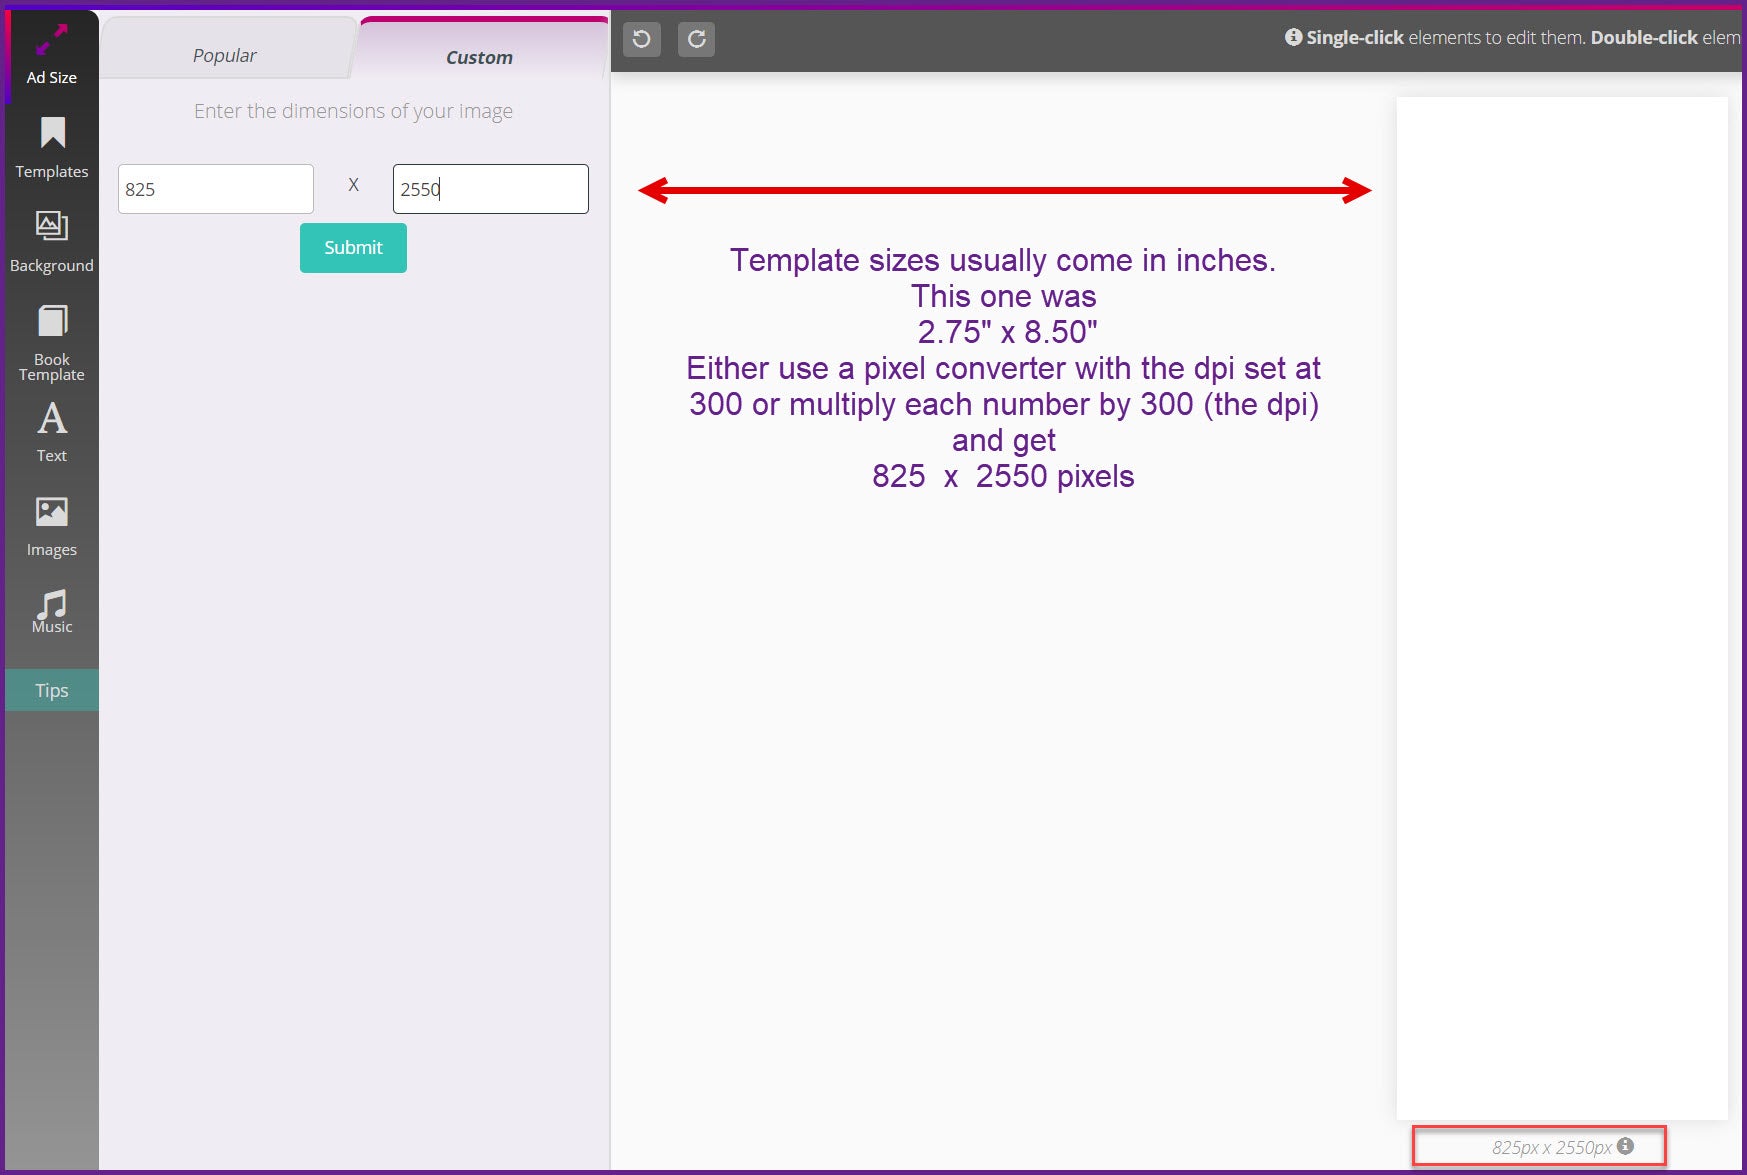
You’ll note that the dimensions needed are in pixels. This is my favorite site to use for converting. https://www.ninjaunits.com/converters/pixels/inches-pixels/
HINT: I keep a notebook full of information, like my hex color codes, sites like this, search terms that work well for me, helpful hints, etc.
Or instead of using the site you can do a tiny bit of math. Multiply your inches by 300 which is the resolution we use at Book Brush.
Be sure you know the size of the template you need either from your printer, premade cards or promotional company.
click on image to enlarge
Then you start designing. Note this new icon to help you work faster.
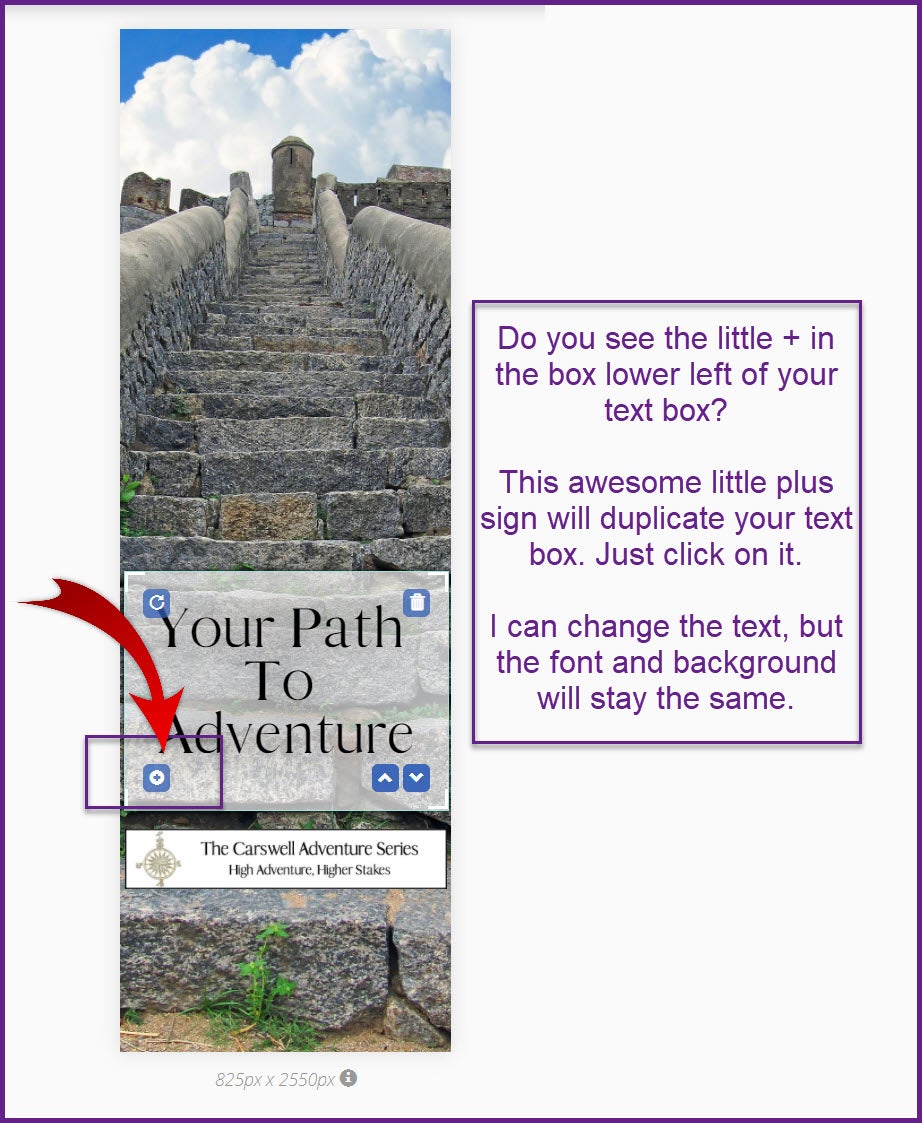
click on image to enlarge
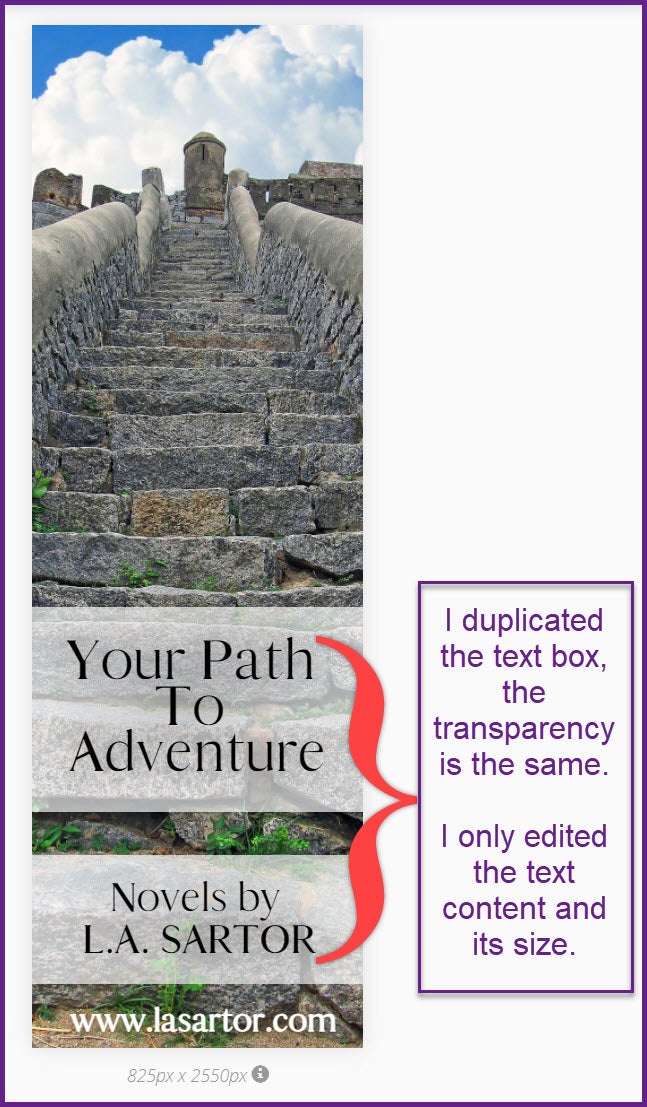
click on image to enlarge
EXTRAS ~ BEST PRACTICES
SAVE YOUR TEMPLATES AS YOU WORK
Some plans are limited in the number of templates you can save, but remember it’s a rolling number, so just delete the ones you won’t use after you’ve nailed your design.
DOWNLOAD to your computer when finished. Get in onto your computer. Create a filing system so that you know where you download your Book Brush material.
I have files for each book title and in those files I have one entitled Book Brush, then Memes, Covers, etc. That way I can find them easily and quickly.
Once you’re finished with all the designing, take the file to a print shop or print at home or send to your promotion company to print for. (Remember if you’re going to use a company, make sure you know what sizes they need and create a custom size to match.)
I’ll print these on plain paper using the template from pcforms to make sure they work before I try them on the real bookmark stock I’ve purchased.
If needed, you can always size them a bit in whichever program you’re using. This particular form works with Word. I place the image I’ve downloaded from Book Brush. Size it if necessary, then copy and duplicate to fill all the template boxes, then print. After it’s done printing I line it up with the template by holding it up to a window or light and once satisfied, go ahead and print on my perforated bookmarks.
TWO MORE EXTRAS YOU CAN ADD TO YOUR BOOKMARKS
Punch a hole in the top and add a ribbon. You can see the finished product as well as some links to forms and promotion companies using the above link 🙂
Or create a label you can print and add to the back with a code for whatever, redeem a free book, your website, a CTA (call to action) to join your mailing list.
Then hand out these easy-peasy bookmarks with pride.

Article by L.A. Sartor
I started writing as a child, really. A few things happened on the way to becoming a published author … specifically, a junior high school teacher who told me I couldn’t write because I didn’t want to study … urk … grammar… That English teacher stopped my writing for years.
But the muse couldn’t be denied, and eventually I wrote, a lot. I learned a litany of new things and published my first novel. My second book became a bestseller, and I’m absolutely on the right course in my life.
Please come visit me at www.lasartor.com, see my books, find my social media links, and sign up for my mailing list. I have a gift I’ve specifically created for my new email subscribers.