There is truly no better time than right now to quickly create boxed content for readers. It can be a series, all your titles, or maybe even the first book in several series to hook your readers! Book Brush features a Box-Set Creator that’s quick and easy to use. If you don’t have a Book Brush account, you can register here.
In Book Brush, you’ll have a variety of handy author-industry related tools to choose from. When you open the Box-Set Creator under Tools, it launches with the Book Brush Splash Screen, this is what you’ll see first:
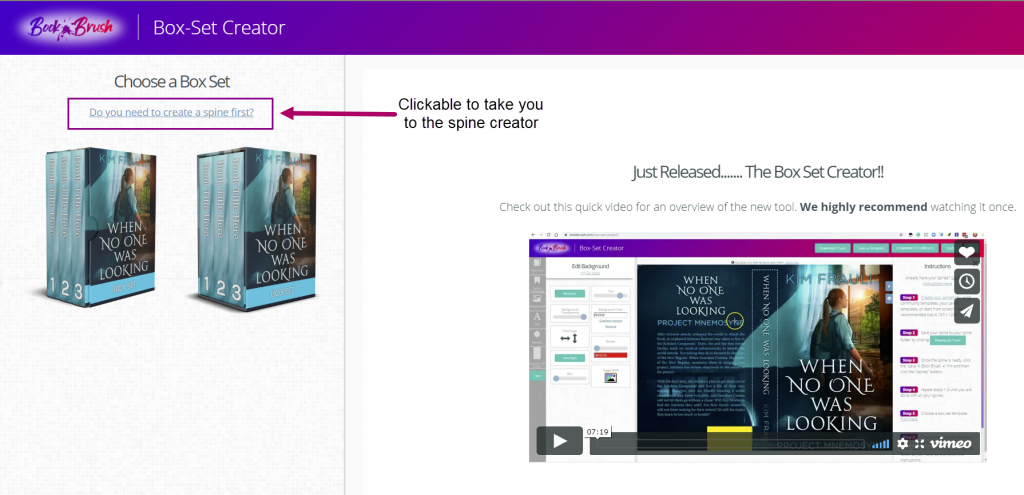
It’s highly recommended that you watch the video at least once to get the basic overview. Then you can refer back to this post for reminders. I’m taking you step by step. The good news is that you’ll use this spine for your entire series boxed set, just changing cover image, title and book number.
Step 1
Create Your Spine
(If you’ve already created Spines you can skip this step)
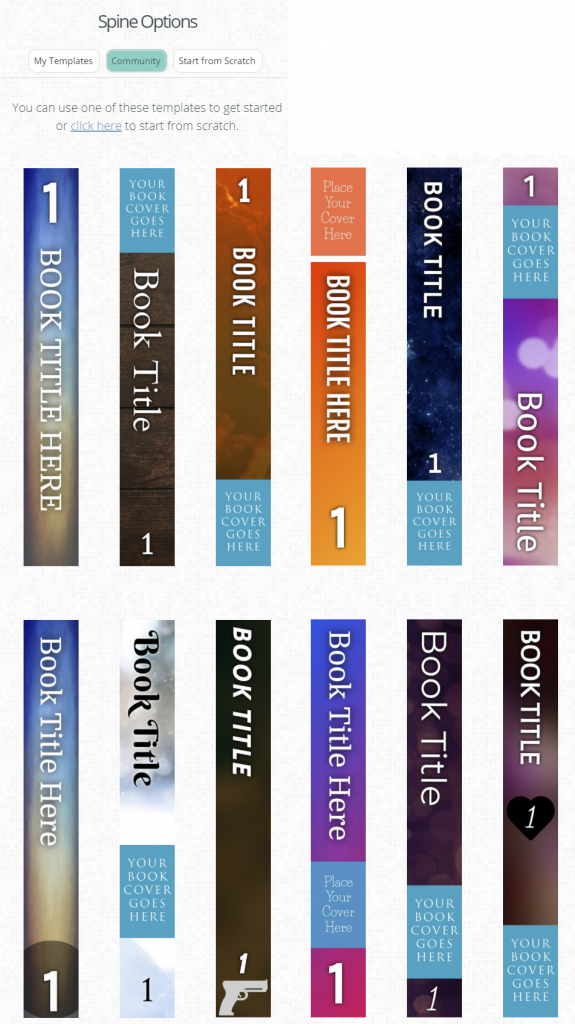
Scroll through the amazing number of options, including making your own custom spine. Below is just a sample of what is available to you.
- I’m choosing template 2
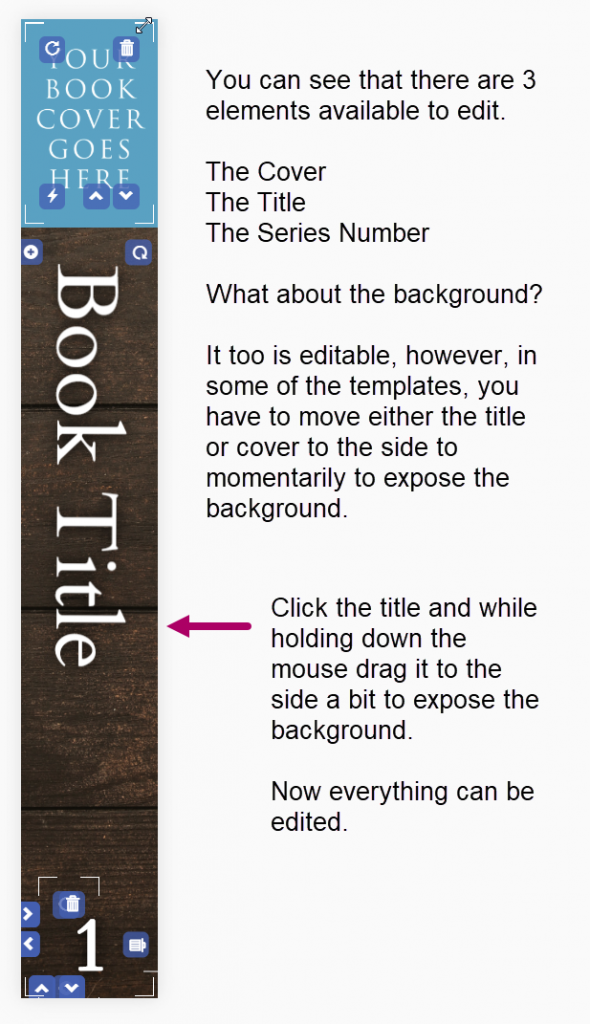
If you don’t know how to edit any of these segments, check out this video about the Custom Creator. The processes are the same throughout Book Brush’s many applications. It’s super easy and it’s amazing how much you can customize easily.
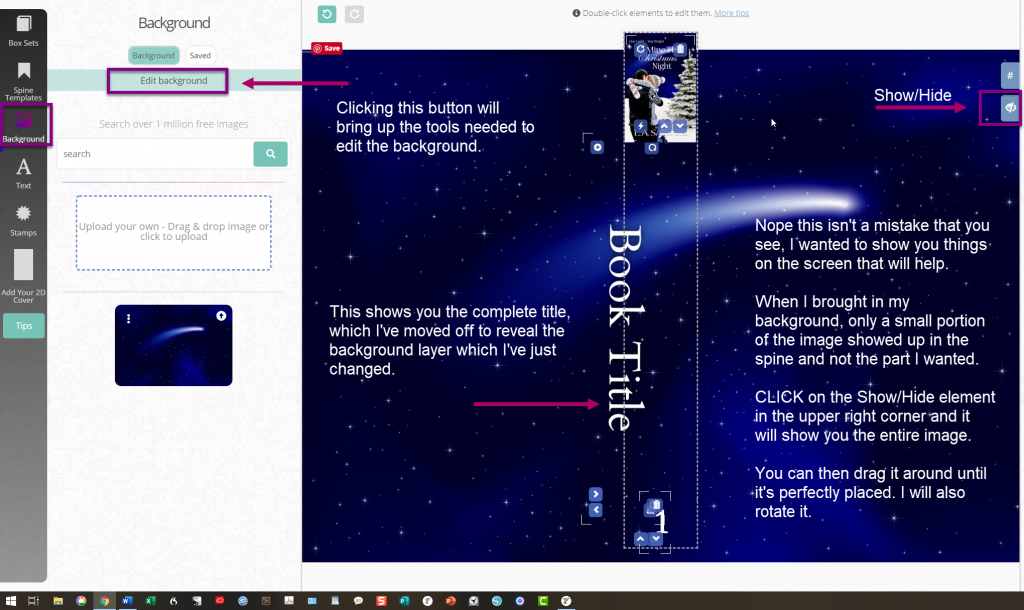
You can see I’ve already added the book cover and now I’m working on the background.
- Instead of choosing one from the million+ stock backgrounds that Book Brush offers, I used one that is featured on my series.
- Hint: I upload (or save) all my covers the minute I’m done with them, that way they are always available to me no matter what I’m going to create.
Next, I’m adding the title and changing the font and size.

Last step is simply changing the number size/font if desired. What you see is my finished spine.
Once it’s done, click download/save in the upper right corner of the Book Brush bar.
- Once the download has finished preparing, you’ll be asked where you want to save it.
- Save it in spines.

Close the window and you’ll be back on the edit page.
Here is a trick for you, I save it again in save template just in case I need it later.
The good news is that you’ll use this basic spine for your entire boxed set, just changing the cover image, title and book number. BTW I made those additional 3 spines in a minute. Saved them in spines and I’m done with that part.
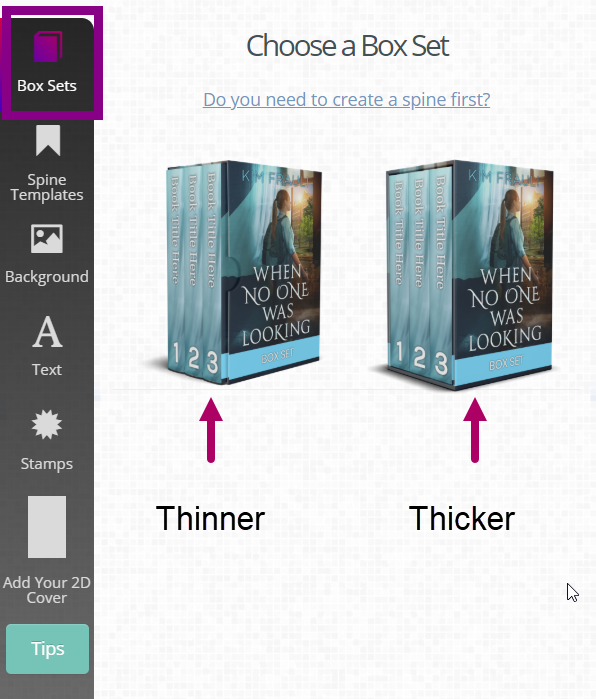
Step 2
Now I’m ready to put my box set together.
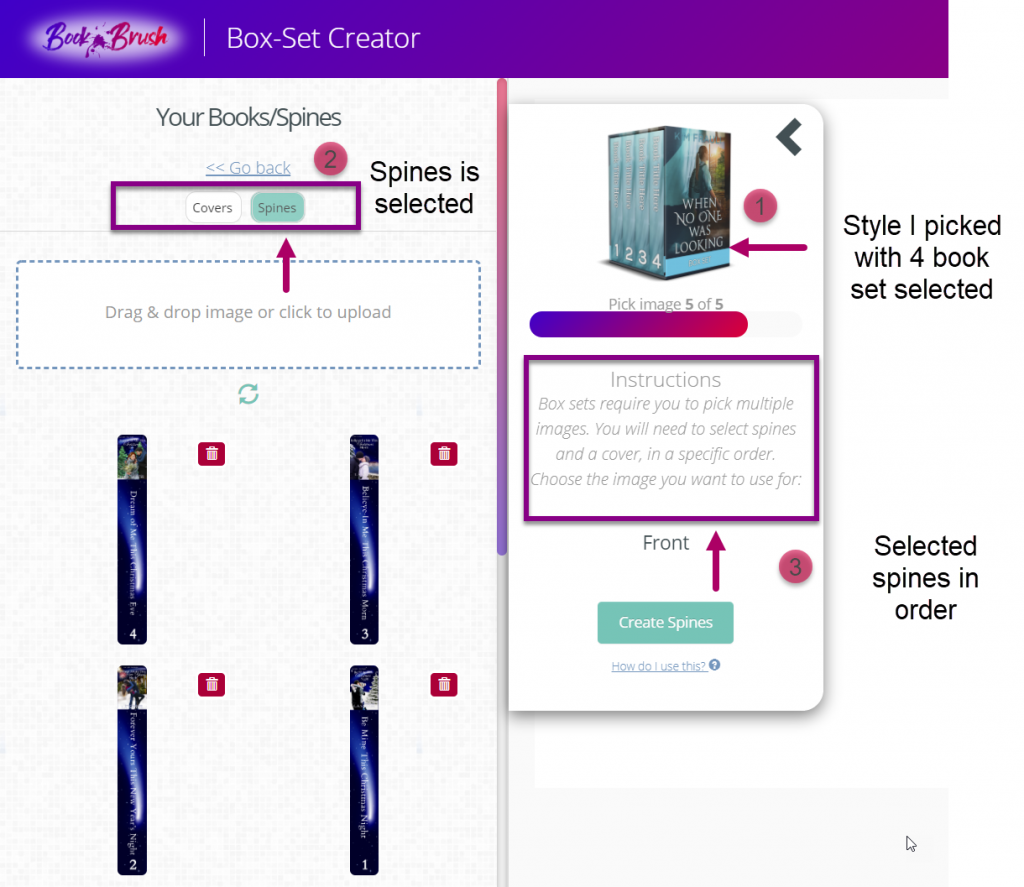
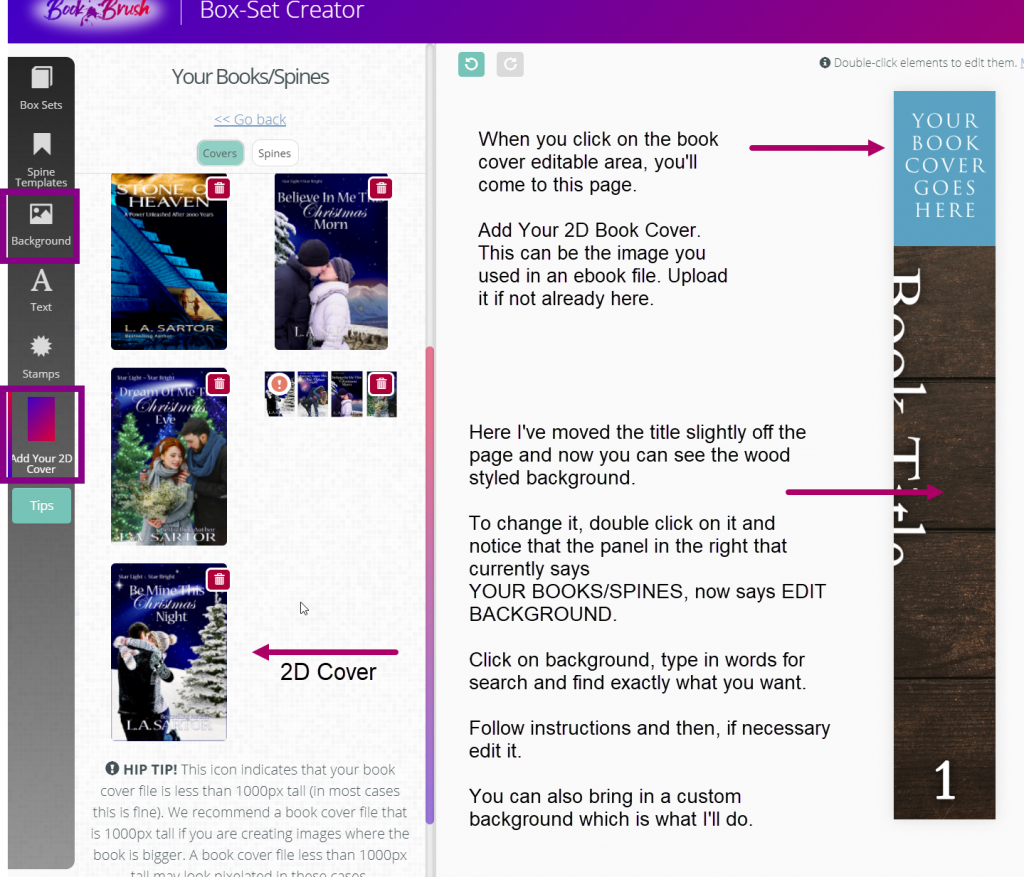
Once my spines are added I click on covers and automatically the 2D covers panel opens. I made a cover in the Custom Cover Creator and saved it in book covers. Quick and easy. Here is more information on how to use it.
- But you don’t have to this at all, you can use a book cover you already have.
Once you add your cover, Book Brush does its magic and presto, you have a boxed set.
Now you need to save it in My Stamps.
- I take two additional steps, I save it to my computer as both a .jpg and .png.
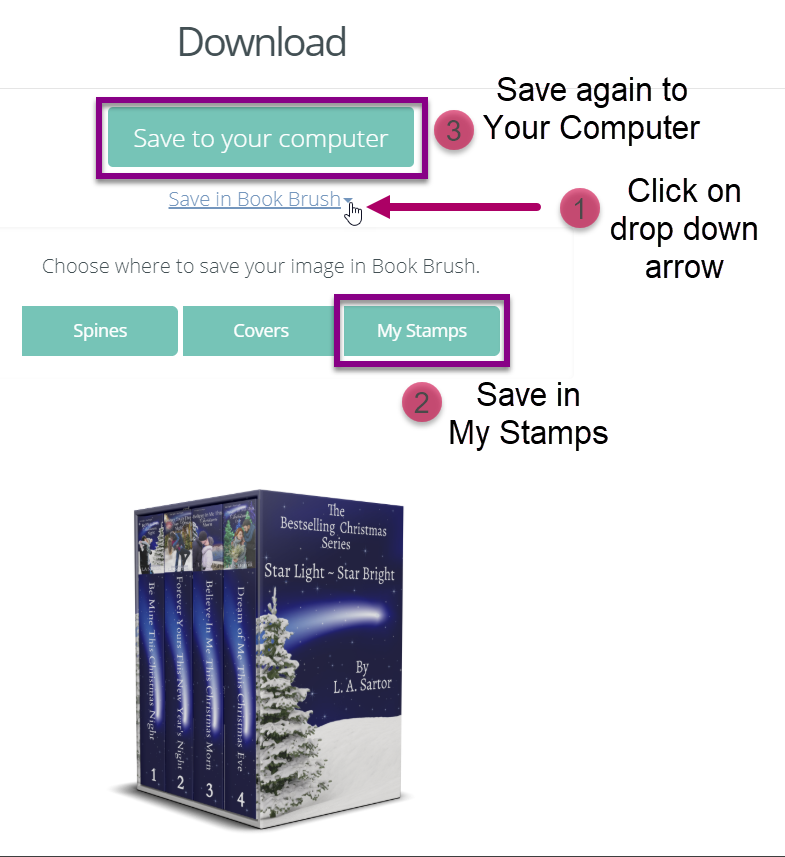
And it’s done!! (*note this box set was created for this blog post but it is not yet available!)
These are a few ways I can use it in Facebook ads, Instagram, Twitter and more on social media all created in the Custom Creator.


For more information:
Box Set Creator
Cover Creator
Custom Creator
I hope this helped you find the creative magic to create a boxed set image in minutes.
![Leslie Sartor photo]() Article by L.A. Sartor
Article by L.A. Sartor
 Article by L.A. Sartor
I started writing as a child, really. A few things happened on the way to becoming a published author … specifically, a junior high school teacher who told me I couldn’t write because I didn’t want to study … urk … grammar… That English teacher stopped my writing for years. But the muse couldn’t be denied, and eventually I wrote, a lot, some of it award winning. However, I wasn’t really making a career from any of this. My husband told me repeatedly that independent publishing was becoming a valid way to publish a novel. I didn’t believe him even after he showed me several Wall Street Journal articles. I thought indie meant vanity press. I couldn’t have been more wrong. I started pursuing this direction seriously, hit the keyboard, learned a litany of new things and published my first novel. My second book became a bestseller, and I’m absolutely on the right course in my life.
Please come visit me at www.lasartor.com, see my books, find my social media links, and sign up for my mailing list. I have a gift I’ve specifically created for my new email subscribers. And remember, you can email me at Leslie@LeslieSartor.com